


How to set up different seatings
In this article
Resos guides are meant to help you set up your profile in the way you need it to. With this guide on how to set up different seatings, you will quickly be ready to take online bookings with different time intervals and booking durations for a customized experience. You can choose to create a personalized set of settings both for the default setup or further customize it for each opening hour. Read more to find out how to do so.
Video walkthrough
Prefer to watch instead of read? This short video shows how to set up your default seating settings and customize them for individual opening hours:
What is the time interval and booking duration
Here are some quick definitions for these terms:
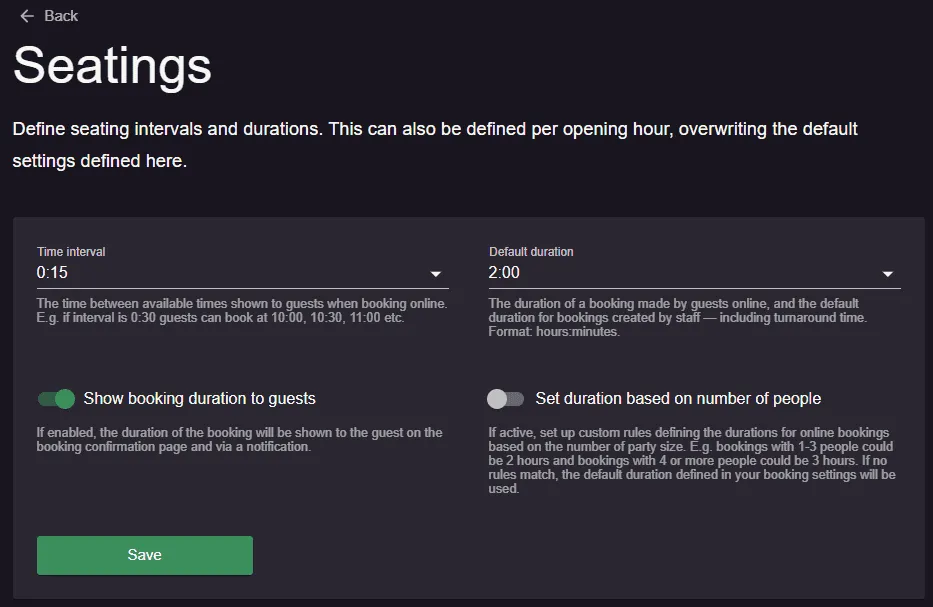
- Time interval: The time between available times shown to guests when booking online. E.g. if the interval is 0:30, guests can book at 10:00, 10:30, 11:00, etc.
- Default duration: The duration of a booking made by guests online and the default duration set on bookings created by the staff. Including turnaround time. Format: hours: minutes.
Between them, these two settings decide the gap between your bookable times and, by default, how long a booking holds a table. The time interval has no other source. The duration does: turn on Set duration based on number of people and the party size decides the duration instead, overriding Default duration for the bookings it covers. See set a booking duration based on the party size.
Seatings do not cap how much you take in. The time interval and duration control spacing and length, not volume. They cannot stop you accepting more bookings or guests than you want in a service. That cap is the Limits tab on each opening hour, under Menu → Settings & add-ons → General → Opening hours. See how to set up limits within opening hours.
Set up default seatings
Your opening hours can have the same settings on a daily basis for consistency. If this is something that applies to your establishment, then you can simply set up the default seatings for your profile, and then the same time interval and booking duration will be applied to every opening hour and special opening hour created (even though you can still customize these).
In order to set up the default time interval and booking duration, you can go to: Menu → Settings & add-ons → Bookings → Seatings. In this section, you can also choose if you wish your guests to see the booking duration, or to set a booking duration based on the party size.
Set up seatings for your opening hours
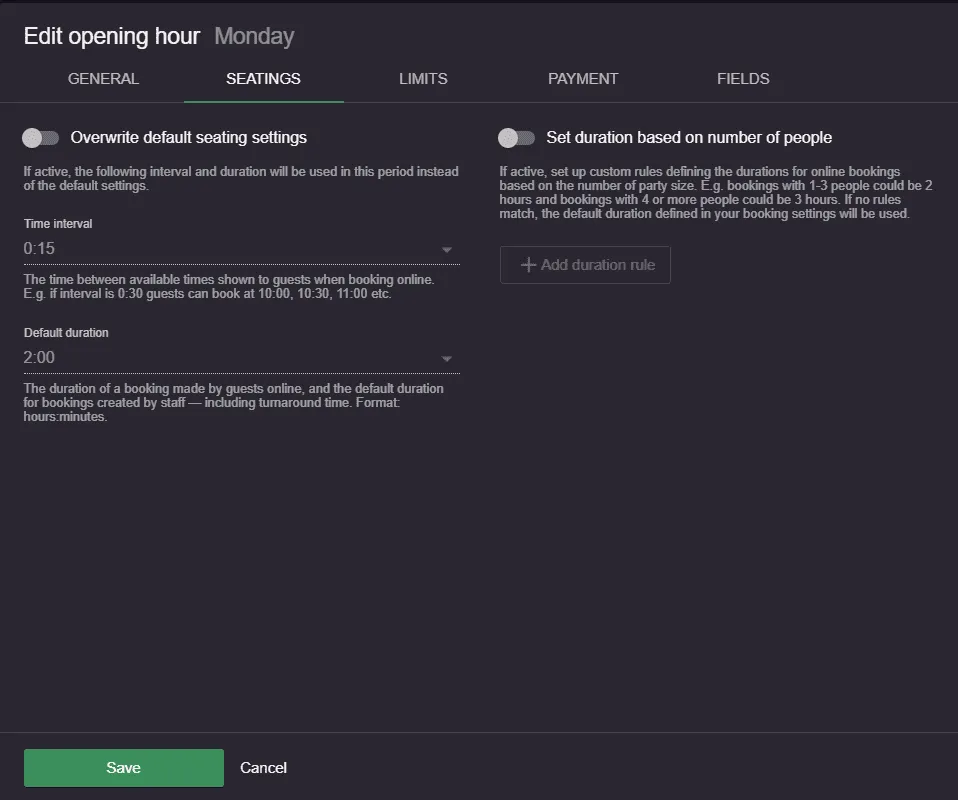
If you wish to have different seatings for the days when you are open, you can override the default on a single opening hour. Go to Menu → Settings & add-ons → General → Opening hours, click Edit on the opening hour you want to change, and open its Seatings tab. Turn on Overwrite default seating settings first: until you do, Time interval and Default duration on that tab stay greyed out. Then set the time interval and booking duration you want for that day and save.
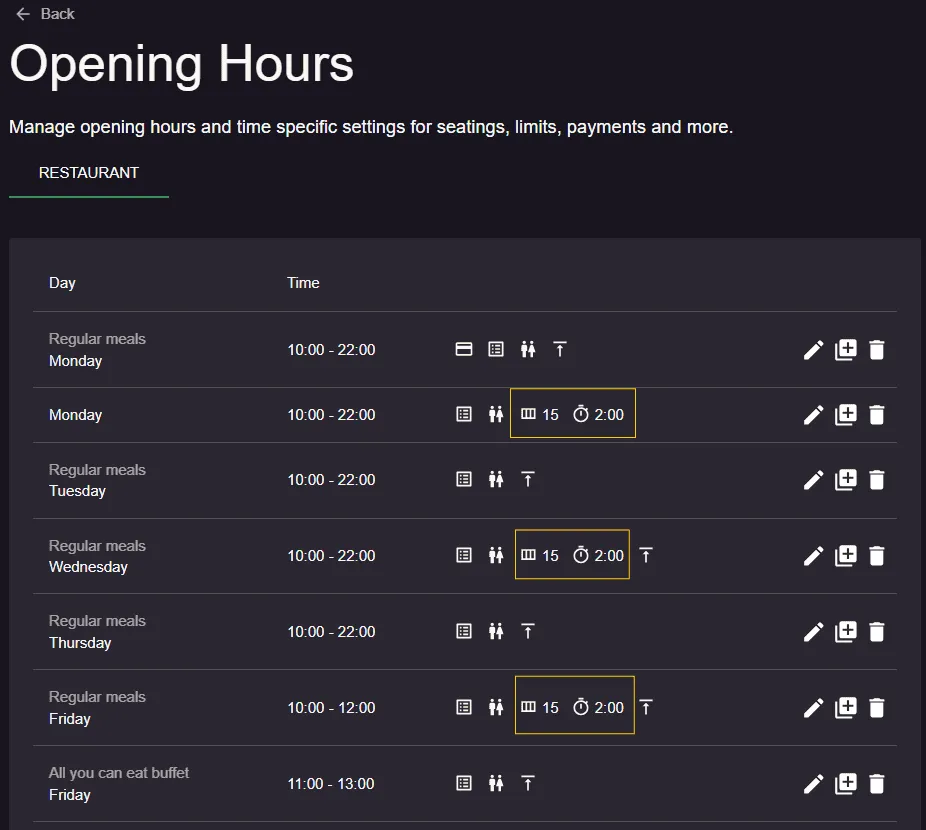
As shown in the image below, there are small icons in line with some of the opening hours. These icons indicate the customized settings for that seating, so this might be useful in case you need an overview of the opening hours that have customized seatings.
Charge a deposit for one seating
Deposits need an active paid plan and the Online payment add-on connected to Stripe. Online payment cannot be activated on the Free plan, so deposits cannot be taken on it either. Which paid tier you are on does not matter, any of them will do. On top of that, the Prepayment add-on has to be active: if Require prepayment is greyed out on the opening hour, activate it at Menu → Settings & add-ons → Payment → Prepayment. Prepayment only becomes available once Online payment is active and connected to Stripe.
A deposit is not a seating setting: it lives on the same opening hour, on its Payment tab, so a service you run as its own opening hour (a show night, a tasting menu, a fixed-menu sitting) can ask for a prepayment while your regular service asks for nothing. See set a different deposit for each service for the full walkthrough, including how to split a day into two opening hours for a one-off event.
Need help? We hope this guide for setting up seatings is useful. However, if you have any questions, please do not hesitate to contact us at hi@resos.com!


