


How to manually accept booking requests
In this article
Accept and manage bookings in the way that suits you the best. Keep your everyday life simpler by offering online bookings that you accept or reject yourself.
Do you want to accept your reservations manually instead of confirming reservations automatically? With Resos, you can do both. You have the option to accept and manage bookings manually if you wish, bringing you more control over bookings and a better overview of them.
If you want to have full control over your bookings and manage them manually, then you must log in to your Resos profile. Go to Menu → Settings & add-ons → Bookings → Managing bookings → New online bookings. Here you have multiple options to manage tables and to accept new online bookings.
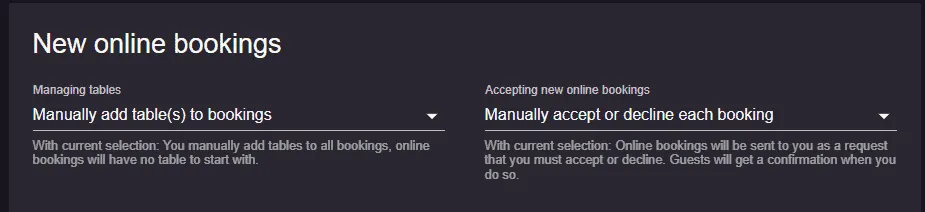
For Managing tables, you can choose Manually add table(s) to bookings if you want to add tables to bookings, but if you don’t want to use tables at all, then you can pick Don’t use table management. For Accepting new online bookings, you can either choose Manually accept or decline each booking or Manually if a table is available (if you decide to use tables in the system).
What does the booking look like?
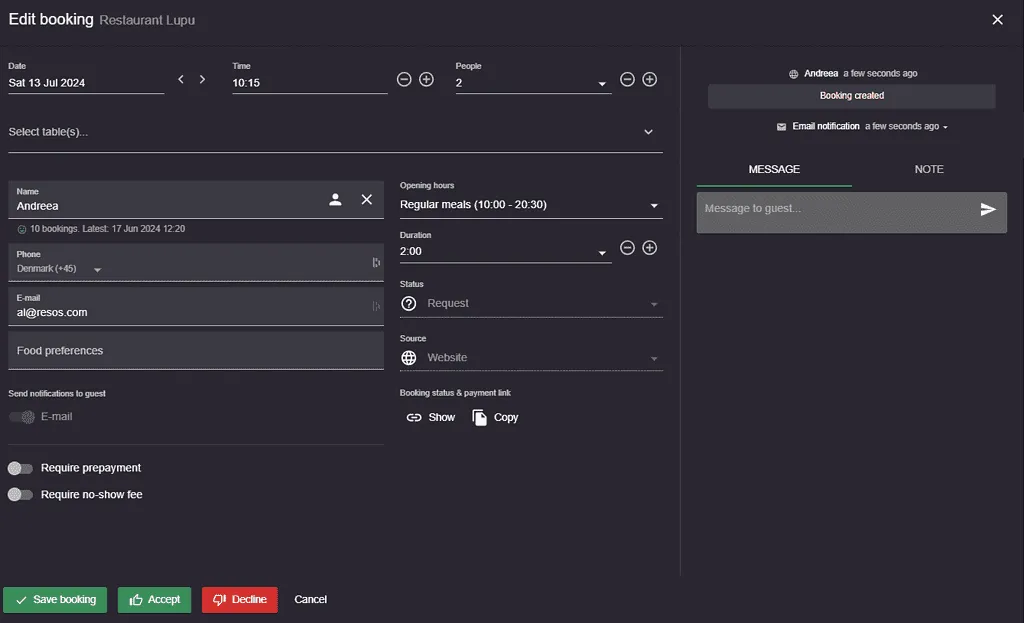
By choosing to manually handle a booking, the booking will be added to the system as a request. So, it’s up to you if you want to accept or decline the booking. You can do that by going to Menu → Calendar/Schedule/List/Floor plan → Click on the specific day and booking request → Click Accept/Decline.
What do the guests see in this case?
Perhaps you are wondering what your guests see when they requested a booking. Check out this screenshot of the external layout.
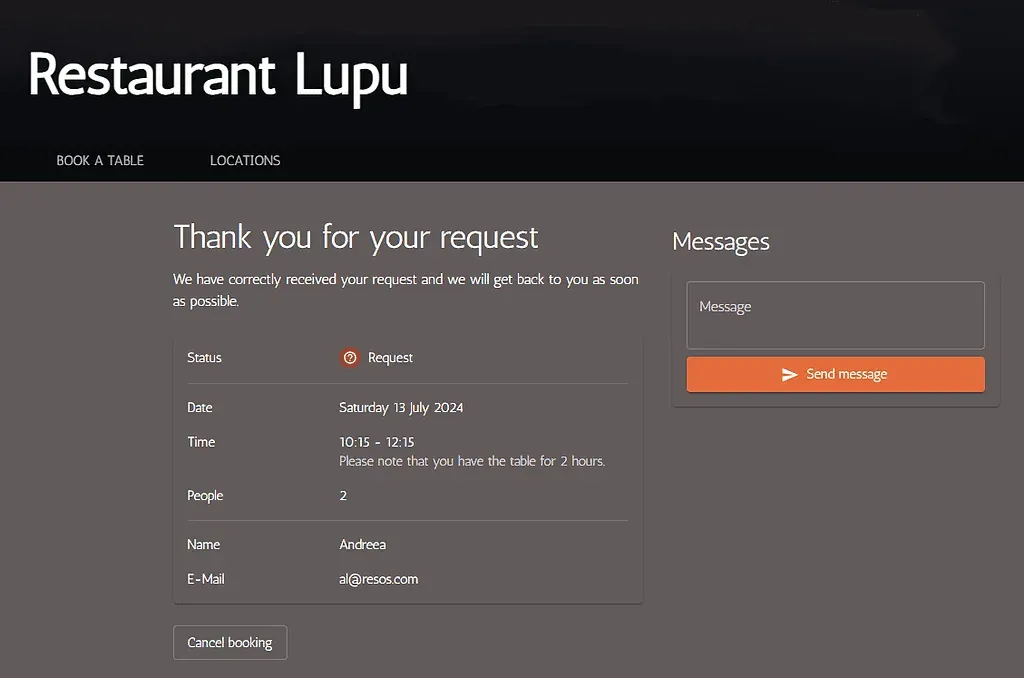
Depending on your choice of accepting or rejecting their booking, your guests will be notified via the status page (from the screenshot from above) and they will also receive an email/SMS/both email and SMS notification with the restaurant’s decision.
Which email does the guest get, a confirmation or a request?
The guest email follows the status the booking is created with, and that status follows Accepting new online bookings under Menu → Settings & add-ons → Bookings → Managing bookings → New online bookings.
- Manually accept or decline each booking and Manually if a table is available: the booking is created as a request. The guest gets Booking request received, which says it is not a confirmation. When you accept, the guest gets Booking confirmation. When you decline, the guest gets Booking request declined.
- Automatically accept all bookings and Accept booking if a table is available: the booking is accepted at once and the guest gets Booking confirmation right away. When the opening hour asks for a prepayment or a no-show fee, the guest first gets Complete your booking, and Booking confirmation follows once the payment step is done.
With Automatically accept all bookings, every booking the booking page lets through is accepted and confirmed, whether or not a table is free. If you want to review each one first, choose Manually accept or decline each booking. Accept booking if a table is available and Manually if a table is available use table management, see how to set up and enable table management.
To change the wording of these emails, see how to customize booking notifications.
Do you have any questions about managing bookings manually? Our support team is here to help you, you just need to reach out to hi@resos.com, and they will assist you right away!


