


How to select tables on a booking
After you have enabled table management and set up your tables, the next step is to choose tables for a booking made both online (if that’s how you set it up) and manually. Here is how you select tables on a booking.
When adding a booking or walk-in, you can choose what table the guests from the booking should sit at. The system will automatically suggest the best available table or table combination. The suggestion is based on the selected table assignment strategy, as well as the date and time, the number of guests, the booking duration, table availability, and the configured table and area priorities. Read more about table assignment strategies and priorities here.
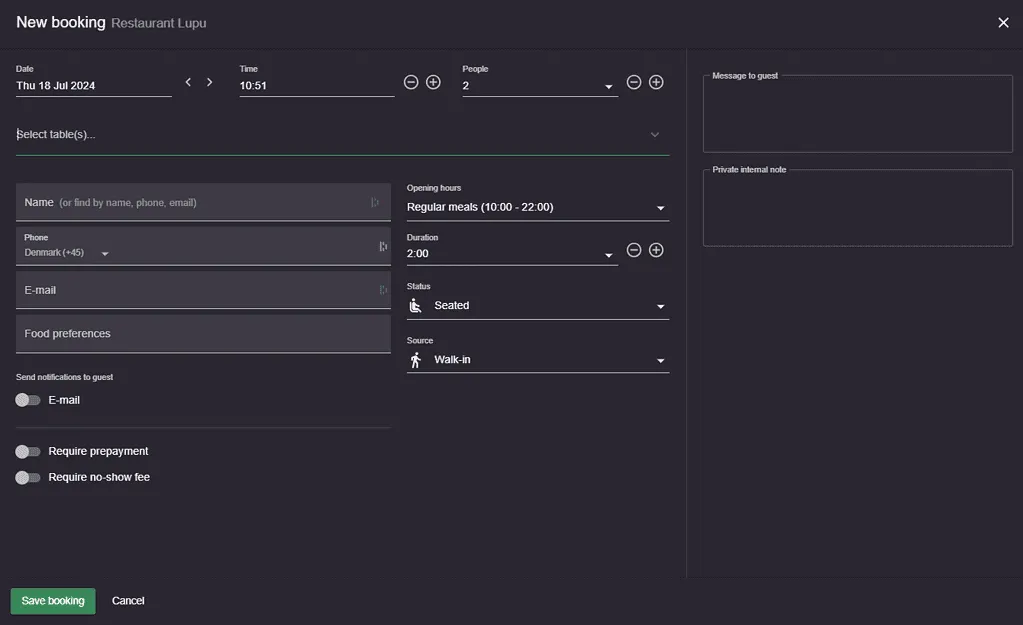
When changing the date, time, people, or duration, the suggested and available tables will update to match. Click the table selector to choose another table or a combination of tables. You may also type in part of the table name to filter the tables shown. Next to the names of the tables, the minimum and maximum seating capacity of the table or table combination is shown.
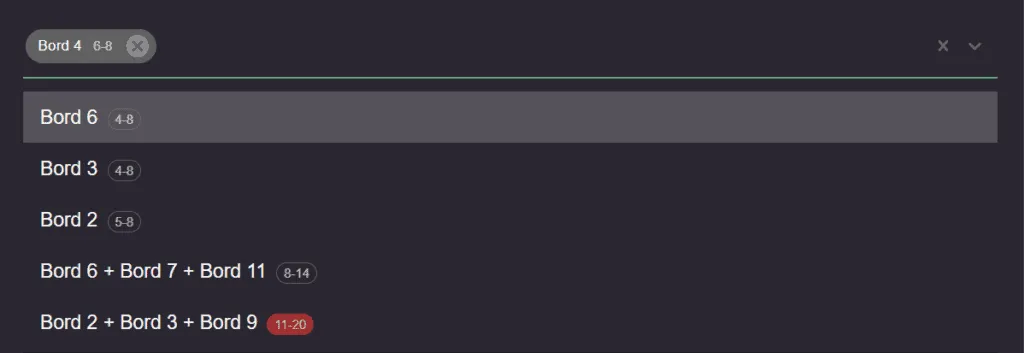
Tables that can fit the number of people on a booking, but have been defined with a higher number for the minimum seatings, can still be selected but will be shown with a red capacity highlighter (as seen in the screenshot above). To exemplify, if you have a booking for 3 guests, but you try to add a table that seats a minimum of 4 guests and a maximum of 6 guests, you can still add the table to the booking, but the system will highlight it in red.
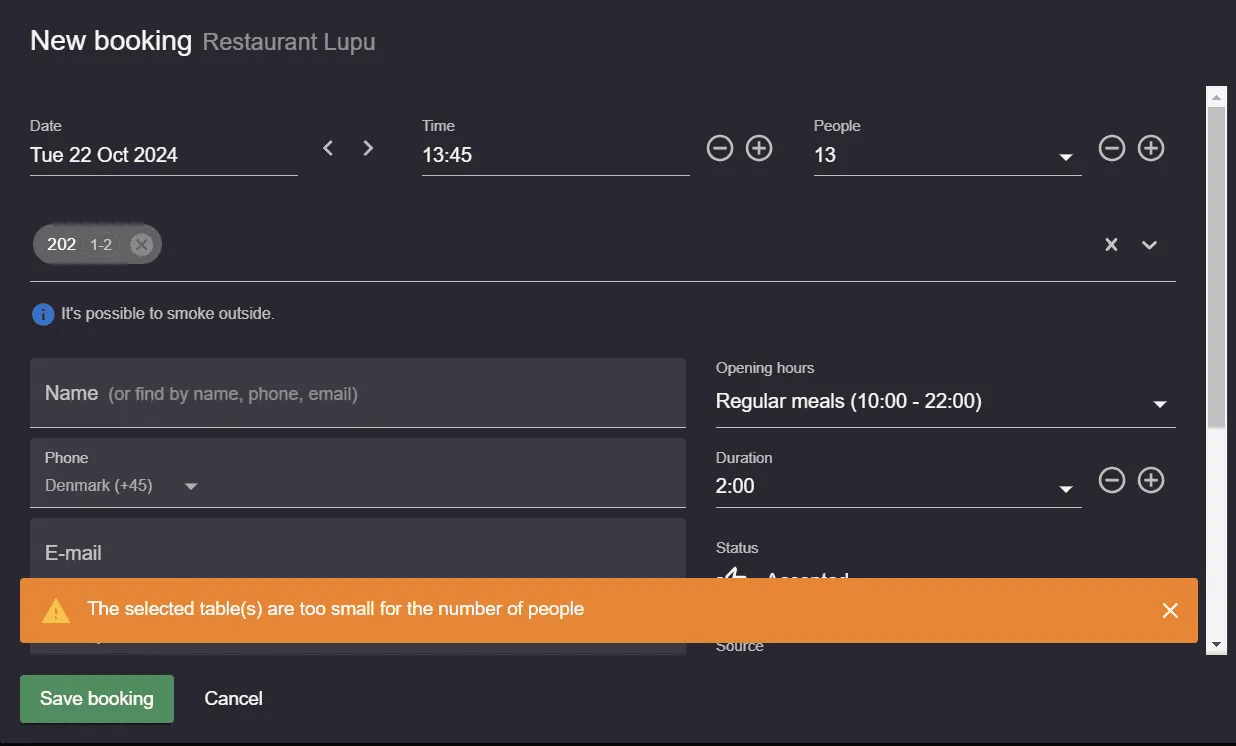
On the other hand, if you pick a table that doesn’t fit the number of guests from the booking, and is not part of a table combination, the system will show a warning.
Can I merge two bookings or put them on one table?
Bookings cannot be merged. Each booking keeps its own guests, tables and payment, so a guest who made two separate bookings, paid for separately, still has two bookings in Resos.
In the booking form, the table selector only lists tables that are free for the booking’s whole time and duration. A table that another booking already holds during that time is not offered there, and neither is a table combination that includes it.
To seat a second booking at a table that already has a booking, use the Schedule view (go to Menu and click Schedule):
- Drag the second booking onto an empty part of the row of the table the first booking is on, not onto the first booking itself: dropping one booking on another offers to swap their tables (Switch tables). Drop it on the table name to keep its time; dropping it further along the row also changes its time.
- Resos asks you to confirm and names the booking it will overlap with: “Booking will overlap with … at …”.
- Click Move booking to place it there anyway, or Edit booking to open the booking form instead.
Both bookings then sit on the same table, each with its own payment. When they overlap by more than a quarter of the booking’s duration, the schedule shows a warning icon on the booking with the tooltip Significant overlap!. A booking whose table is locked cannot be dragged until you unlock it with the lock icon next to the tables in the booking form (tooltip Unlock table).
Drag and drop is not available on a phone-sized screen, or when Disable drag and drop is switched on under Menu → Settings & add-ons → Bookings → Managing bookings.
To end up with one booking instead, cancel the second one by setting its status to Cancelled. Its payment stays on that booking, and you refund it from there with the Refund button in its payment details (if it is missing or grayed out, see if the Refund button is missing or grayed out). Whether to refund is your choice. One exception: if you cancel a prepaid booking with more notice than its cancellation policy asks for, the prepayment is refunded automatically, the same as when a guest cancels in time. If the booking holds a no-show fee and you cancel it after its cancellation deadline, Resos asks Charge the customer?: pick Don’t charge, or the guest you are seating is charged the fee. See refunds and payment problems on a booking.
What about online bookings?
Guests who make a booking online can automatically be assigned a table, or you can manually choose a table for their online booking. It all depends on how you set up the booking settings in Menu → Settings & add-ons → Bookings → Managing bookings → New online bookings → Managing tables. The allocation of tables for online bookings is also based on the availability of tables, on the area settings, and on table priorities.
Our support team is always ready to walk you through the steps of setting up your profile in whatever way suits your venue. Just reach out to us at hi@resos.com, and we will be more than happy to help!


