


How to add the booking widget to your website
In this article
With this guide, we will walk you through how easy it is to add the booking widget directly to your website. It won’t take more than a few minutes, and you will be ready to receive bookings from guests right away.
For a product overview before you start, see how the Resos restaurant booking widget and direct booking link help guests reserve from your website and other channels.
A widget is a graphical element that lets you integrate a part of another system into your platform. Your guests will book a table on your restaurant’s website, but the reservation will automatically be handled by Resos.
Another option for your guests to book a table at your venue is to use the Resos booking link. Instead of integrating the widget with your website, you can add the link to the booking page to your website. You can find your booking link and widget by going to Menu → Settings & add-ons → General → Link & widget.
If you want a link that opens on one event rather than your whole booking page, set the event up as an experience and use its own share link. The link opens that experience, and the guest still picks the date. See how to set up and share Experiences.
When a guest opens the widget, the booking page loads inside it and walks them through picking a date, the number of guests, a time, their contact details, and confirming, all without leaving your site. Guests who book from your Google Business Profile instead go through a similar flow on Google itself; see how to add the booking link to your Google business profile.
How to set up the widget
Here is a step by step guide on implementing the widget into your website:
- Log into your Resos account.
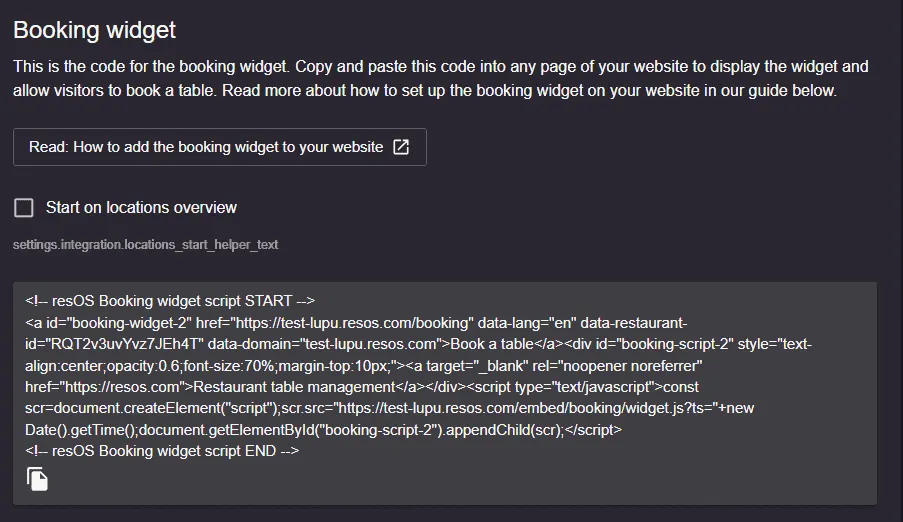
- Go to Menu → Settings & add-ons → General → Link & widget to find your widget code as shown in the image below.
- Insert the widget code in your website codebase.
- Open up the code in your editor, and insert the widget code on the page where you want the booking form to display.
If your site is built on a website builder such as Squarespace, Wix, WordPress, Webflow, Shopify or GoDaddy rather than hand written HTML, paste the code into that builder’s raw HTML or custom code block. See fix: booking widget not showing on your website for what that block is called and what to watch out for on each one.
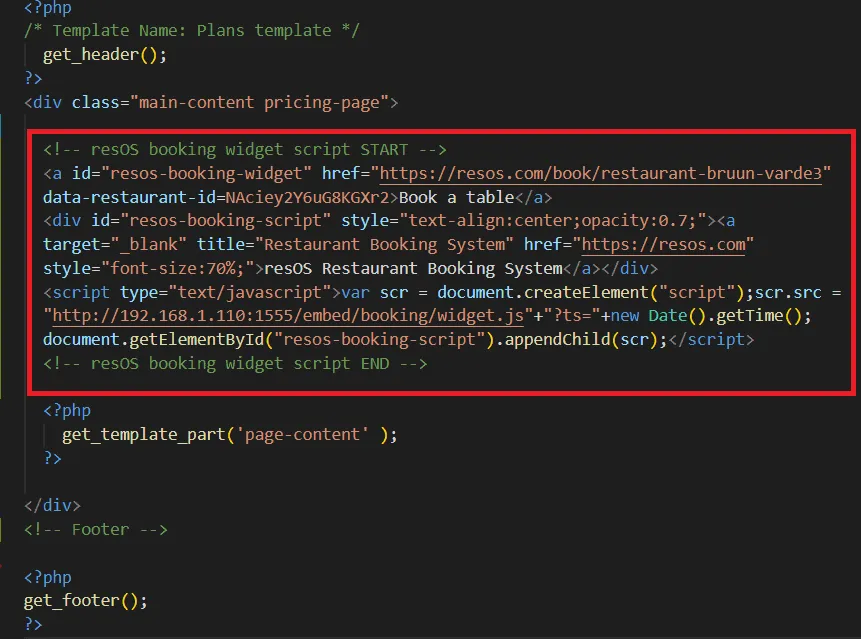
The image below shows an example of a widget code for a test restaurant integrated into a website. As you can see, we inserted the code for it (the red box) into our page template. Your code will look a little different since it’s based on your own restaurant’s data.
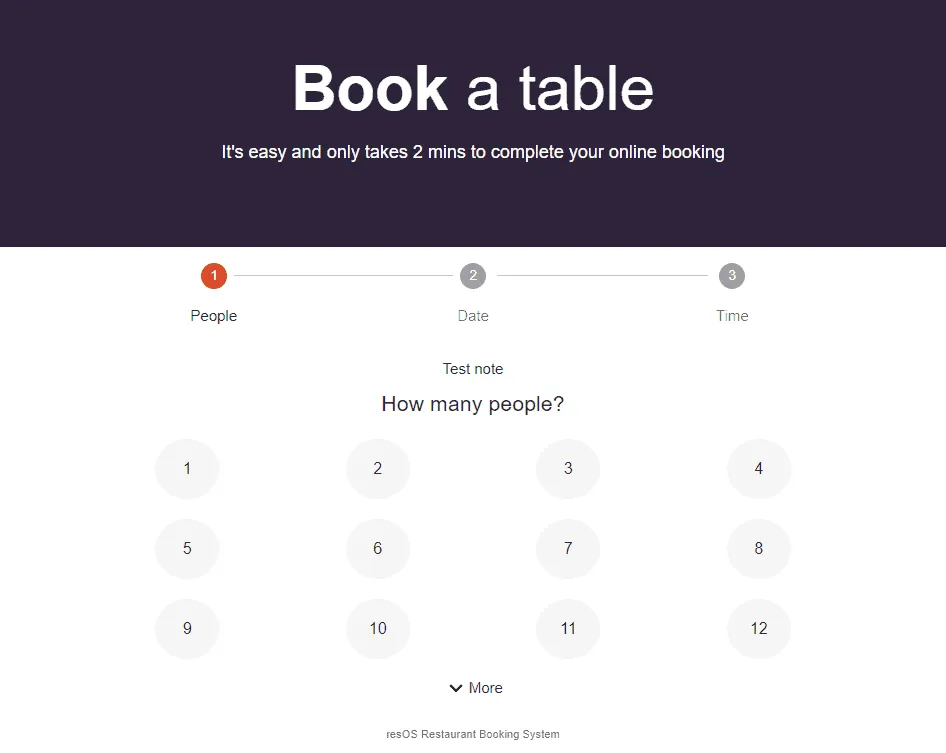
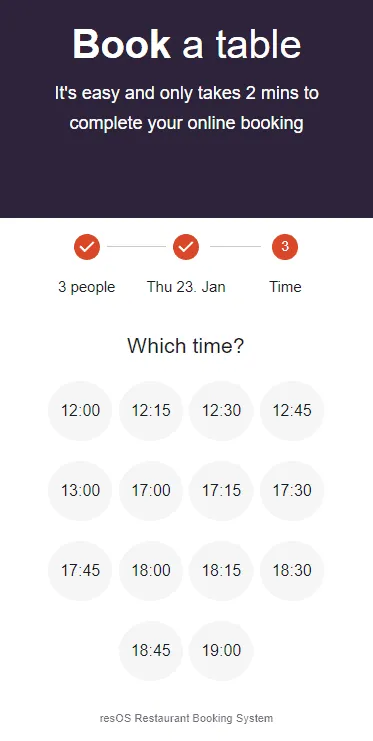
The widget will automatically have a width of 100% of the element it sits in, up to a maximum of about 500 pixels, so to control how much it should fill on the page, you can put it inside another element on the page. Below, you can see how it looks like on mobile and desktop when it is set up correctly.
Booking widget on desktop
Booking widget on mobile
What the widget code contains
The code you copy from Link & widget has three parts, and all three have to survive the paste:
- A link with the class
resos-booking-widget, carrying your restaurant ID, your booking domain and your language asdata-attributes. - A small container with the id
resos-booking-script-3, which also holds the “Powered by Resos” credit. - A short script that loads the Resos widget loader into that container.
When the page loads, the loader finds the link and swaps it for the booking widget. If the script never runs, or the container was removed, the swap never happens and your visitors just see a plain Book a table text link instead of the widget. That link still works and opens your booking page, which is why a broken embed looks like “only a link shows” rather than a blank space.
So the two rules that matter:
- Keep the whole block together, comments included, and never split it across two blocks.
- Paste it into a raw HTML or custom code block, never a normal text or paragraph block. Rich text editors escape angle brackets, and then the code shows up on the page as visible text.
If your code is in place and your site is built on a website builder, or the widget is not showing at all, see fix: booking widget not showing on your website for per-builder fixes (Squarespace, Wix, WordPress, Webflow, Shopify, GoDaddy) and the general troubleshooting checklist.
Link to your booking page from Instagram, social profiles or a button
You do not need the widget to take bookings from outside your website. Your booking link opens the full booking page, so you can paste it into an Instagram bio, a Facebook page, a newsletter, a QR code or a button on your site. Find it under Menu → Settings & add-ons → General → Link & widget.
You can add to the link to change where guests land:
- One event: add
?experience=EXPERIENCE_ID, or copy the ready-made share link from the experience. The link only filters to that event when the Experiences add-on is active. See how to set up and share Experiences. - One language: add
?lang=and the language code, for example?lang=da. See set a default language for guests.
To use both, join them with &, for example ?experience=EXPERIENCE_ID&lang=da.
How to disable the widget
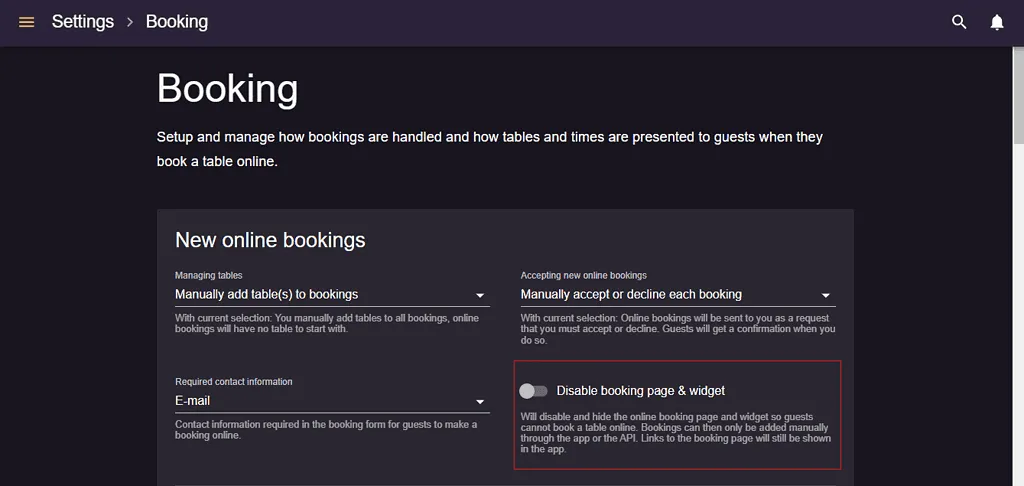
If you wish to receive no more bookings and disable the booking widget, you can do that by going to Menu → Settings & add-ons → Bookings → Managing bookings → New online bookings → Disable booking page & widget. That switch does not cover the REST API or Reserve with Facebook and Instagram, so turn off any integration you have set up as well.
We hope this guide helps you with integrating the widget into your website. If you need help with administrative settings, you can check out this article. Also, if you have any questions or need help with setting anything up, you’re more than welcome to contact us at hi@resos.com.


