


How to set up and share Experiences
In this article
- How to activate the Experiences add-on
- How to create an experience
- 1. Description
- 2. Dates
- 3. Payment
- 4. Visibility
- 5. Advanced
- 6. Share
- How to share a single experience
- How to embed a single experience on your website
- What your guests see
- How to manage your experiences
- How to move a booking into or out of an experience
- Can I make a booking repeat every week for a regular guest?
- Common issues
This guide shows you how to create an experience in Resos, choose whether guests can find it, and share one event as a link or as a widget on your own page. Experiences let guests book an evening by name: New Year’s Eve, a wine tasting, Taco Tuesdays, or a five-course tasting menu. Each one carries its own schedule, description, image, price, and booking limits, and guests pick it at the start of your booking flow instead of booking a plain table.
Prefer to watch first? Here is a short demo of Resos Experiences.
How to activate the Experiences add-on
- Go to Menu → Settings & add-ons and find Experiences in the add-ons list.
- Click Activate add-on. You are taken straight to the Experiences page, where your experiences live from now on: Menu → Settings & add-ons → Experiences.
Experiences is currently in beta, so you will see a “Beta” label next to the headline and small details may still change.
How to create an experience
Click Create Experience. The setup wizard walks you through six steps: Description, Dates, Payment, Visibility, Advanced, and Share. You can step back at any time, and the labels at the top show how far you are.
1. Description
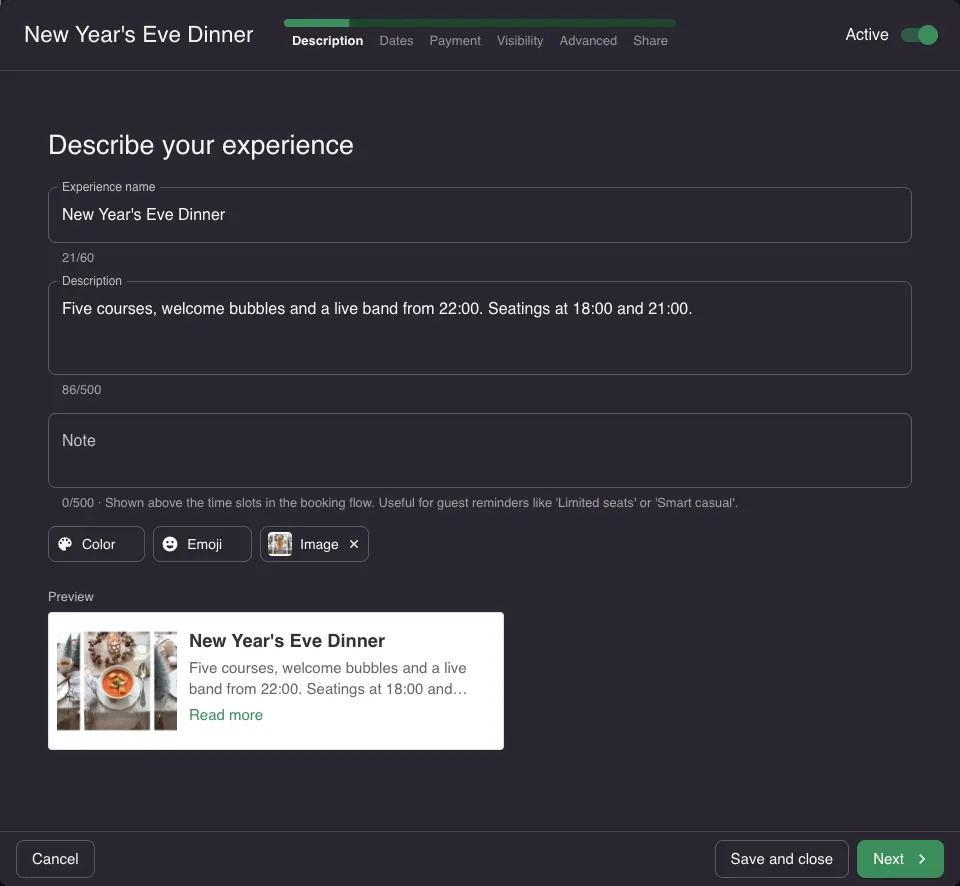
Give the experience a name (up to 60 characters) and a description (up to 500), since this is what guests read on the booking card. Note is optional and appears above the time slots in the booking flow, which makes it the right place for reminders like “Limited seats” or “Smart casual”. Add a Color, an Emoji, or an Image (800 × 500 works best) and the preview at the bottom shows the card exactly as guests will see it.
2. Dates
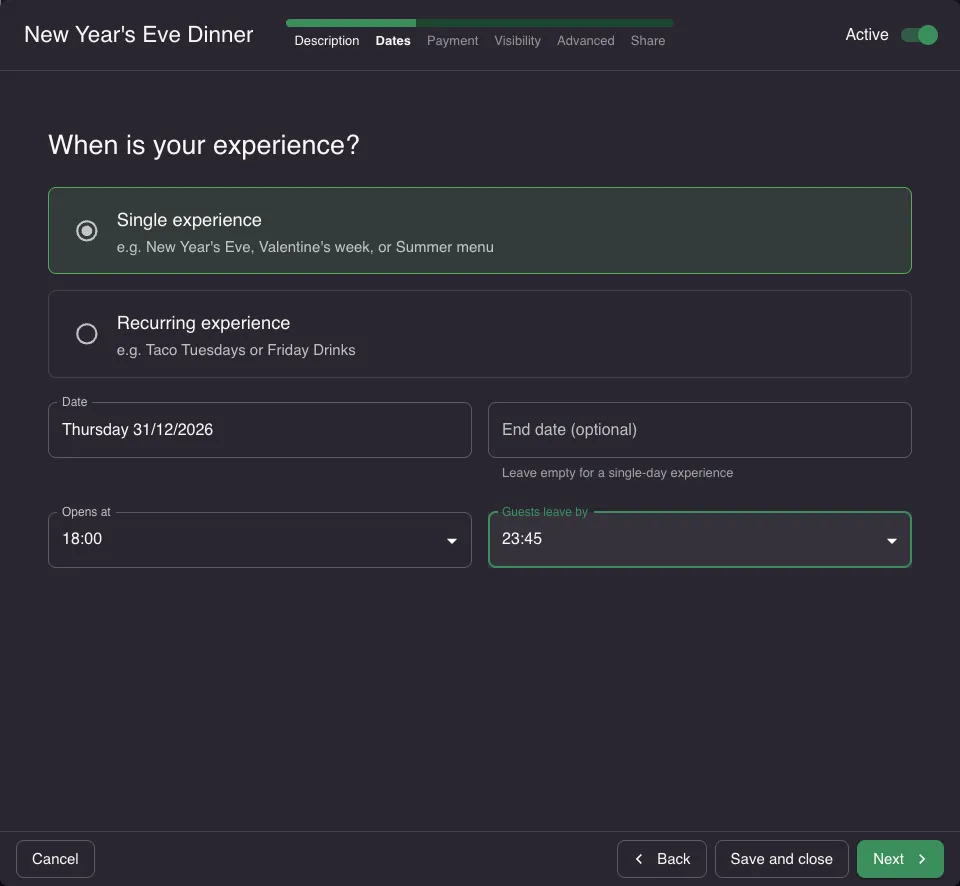
Choose Single experience for a one-off or a limited run (New Year’s Eve, Valentine’s week, a summer menu), or Recurring experience for something that comes back (Taco Tuesdays, Friday drinks).
A single experience takes a Date, an optional End date, and the Opens at and Guests leave by times. Leave the end date empty for a single-day event, or set it and restrict the run to certain weekdays. A recurring experience runs every week or every other week on the weekdays you pick.
3. Payment
Turn on Require prepayment or Charge no-show fee if this event needs one. You set the amount, whether it is charged per booking or per guest, the minimum number of guests it applies to, and the cancellation policy. It works the same way as payments on your opening hours, so an experience can require prepayment even when your regular bookings do not. Pick the one that matches what you want: a prepayment is charged when the guest books, while a no-show fee only saves the guest’s card and is charged afterwards if they do not turn up or cancel too late. An experience carries one of the two, never both.
4. Visibility
Choose who can find the experience. This is the step that decides whether the event shows up in your booking flow at all:
- Public experience: “All guests can view and book the experience.” It appears in the list of experiences on your booking page and in your booking widget.
- Private experience: “Only guests with the link can book this experience.” It is hidden from that list, but it is still fully bookable through its own link. Use it for a company Christmas party, a supper club, a press dinner, or an event you only promote to your newsletter.
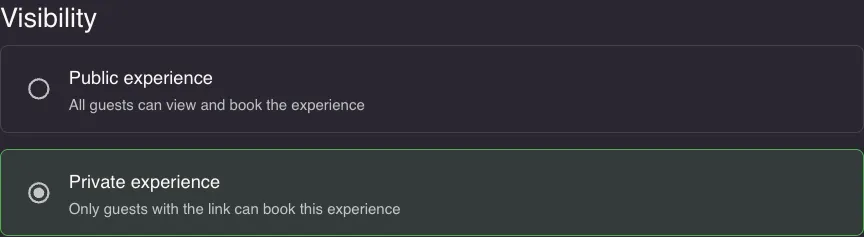
A private experience is hidden, not closed. Anyone with the link can book it, so treat the link as the invitation.
5. Advanced
Optional fine-tuning, collapsed by default, in three sections:
- Seatings: turn on Overwrite default seating settings to give this event its own Time interval and Default duration. Leave it off and the experience uses your account’s normal interval and duration.
- Limits: Max bookings and Max guests for the whole event, plus Max bookings per interval and Max guests per interval, and the waitlist.
- Custom Fields: extra questions asked only on this experience.
If you have Define opening hours per area switched on, you also pick the Areas this experience runs in, back on the Description step. Only areas marked as available online appear in that list.
6. Share
Your booking link, sharing buttons, and a live preview of the widget for this event.
Two things are worth knowing before you get here:
- The Active toggle at the top of the wizard controls whether the experience is live. Until you turn it on, the Share step stays greyed out with the message “Activate above to share experience”.
- The experience saves automatically when you reach the Share step, because the link and the preview need a saved experience to point at. Finish with Done, or use Save and close to come back to it later.
How to share a single experience
Open the experience, go to the Share step, and everything for that one event sits in one place:
- Share link: your booking link with the experience added to it, for example
https://yourrestaurant.resos.com/booking?experience=EXPERIENCE_ID. Use the copy icon to copy it, or the arrow icon to open it in a new tab. - Icon buttons under the link: one-click sharing to Facebook, LinkedIn, WhatsApp, or email.
- Live widget: a preview of exactly what a guest sees when they open the link.
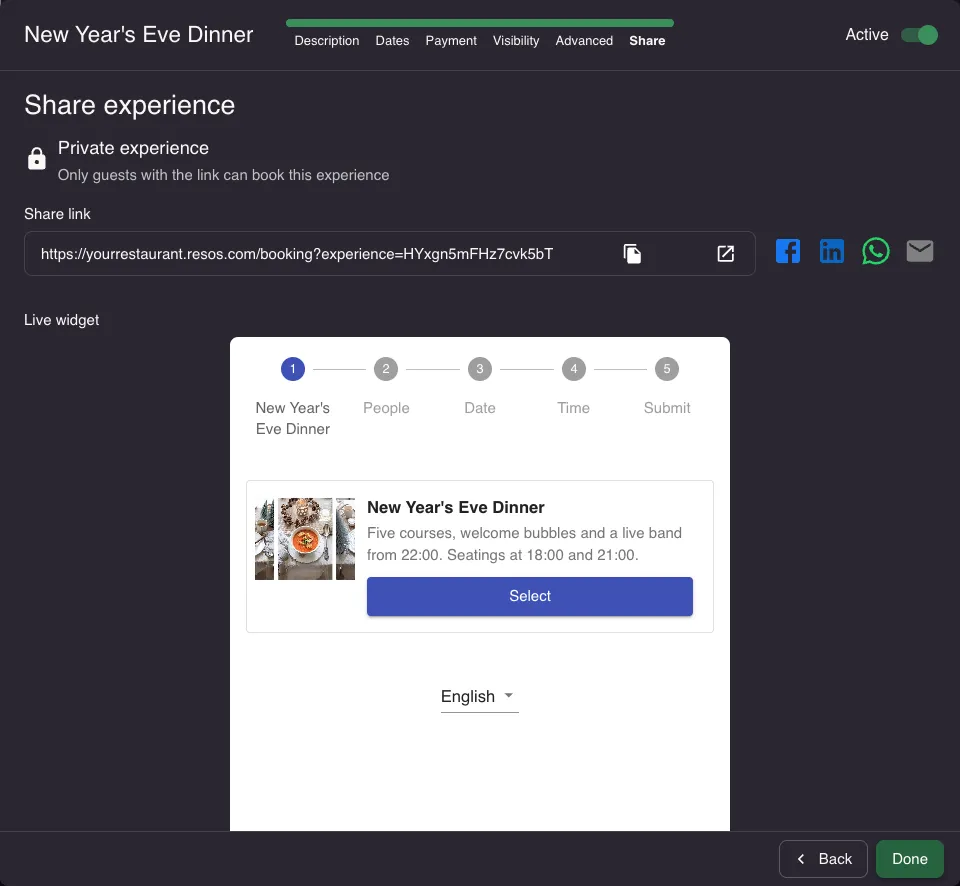
Guests who open that link see only that one experience, so they go straight to picking a time instead of browsing everything else you have on. That makes it a good link for a social post, a newsletter, or a button on your own event page.
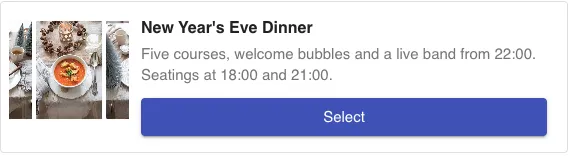
If the Share step says “Save the experience to generate a shareable link”, the experience has not been saved yet. Step forward to Share, or save it, and the link appears.
Tip: You do not have to open the wizard to get the link. Each experience in the list has a Copy link button.
Resos does not generate QR codes. If you want one for a poster, a table card, a menu, or a flyer, copy the share link and paste it into any QR code generator, then scan the finished code with a phone before you print it.
How to embed a single experience on your website
You can also put one experience on its own page on your site without touching your main booking widget. Start from your normal widget code in Menu → Settings & add-ons → General → Link & widget, and add one attribute: data-experience, set to the experience ID from your share link (everything after ?experience=).
<a class="resos-booking-widget"
   href="https://yourrestaurant.resos.com/booking"
   data-lang="en"
   data-restaurant-id="YOUR_RESTAURANT_ID"
   data-domain="yourrestaurant.resos.com"
   data-experience="EXPERIENCE_ID">Book a table</a>
Keep the rest of your snippet exactly as it is, including the script tag below the link.
Your event page then shows a widget for that one event, while your main booking widget stays unchanged. Combine it with a private experience and the event is bookable only where you choose to put it.
What your guests see
With the add-on active and at least one public experience running, the booking flow opens on Choose your experience: a card for each experience with your image, name, description, and price. Alongside them sits the regular booking card, so guests who just want a table can still get one. You can rename that card, rewrite its description, and give it its own image under the Settings tab on the Experiences page.
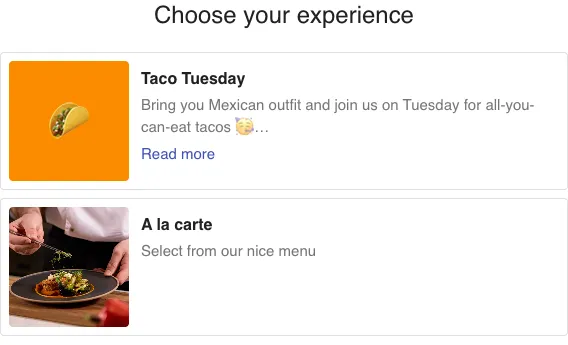
The Regular booking card always comes after the experience cards and cannot be moved. The drag handle on the Experiences page only changes the order of the experiences above it, in your booking flow and in your widget. The card is hidden when you have no regular opening hours at all (opening hours that are not experiences and not special days), and when a guest arrives through a single experience’s share link.
Private experiences never appear in this list, and if nothing is running on the date a guest picks, they see your normal booking flow instead.
How to manage your experiences
The Active and Disabled tabs split your experiences by whether they are live, and past ones are labeled as expired so you can see at a glance which dates have gone. Each row shows the date and time, whether it is public or private, and buttons to copy the link, duplicate it, or edit it.

- Edit reopens the wizard.
- Duplicate is the fastest way to run last year’s event again on a new date.
- Drag the handle on the right to reorder how experiences appear to guests.
- To take one down without deleting it, open it and switch off the Active toggle.
How to move a booking into or out of an experience
A booking you already have, whether a guest made it as a regular booking or you added it yourself, can be moved into an experience from the booking form.
- Open the booking.
- In Opening hours, pick the experience. The list shows the opening hours and experiences on the booking’s date, and experiences have a star (★) after their name. If you have Define opening hours per area switched on, only the ones that run in the area of the booking’s table are listed, so choose the table first.
- Save the booking.
Moving a booking into an experience does not add the experience’s prepayment or no-show fee to it, and the guest is not asked to pay. The booking keeps the payment it already has, if any. To ask for a payment, turn on Require prepayment or Require no-show fee on the same form and type the amount yourself: see prepayments and no-show fees on manual bookings.
A booking stays linked to its experience when you pick another opening hour or move it to another date or time. When its date or time falls outside the experience, the booking shows a warning that it is outside the dates or times of the experience, with a Detach experience button next to it. Click it to remove the experience from the booking, then check Opening hours and save the booking. The button only appears while the booking is outside the experience’s dates or times. While the booking is inside them, the booking form offers no way to remove the experience.
Can I make a booking repeat every week for a regular guest?
No. Every booking is for one date, and Resos has no recurring bookings. For a guest or group that comes every week, add one booking per date.
If what repeats is an event rather than a guest, use a Recurring experience (step 2, Dates): it runs every week or every other week on the weekdays you pick, and each guest still books one date at a time. Monthly is not an option. Recurring special opening hours offer the same two intervals, Weekly and Every other week.
Common issues
- The experience does not appear for guests. Check that the Active toggle is on, that Visibility is set to Public, and that the date or weekday you set actually falls on the day the guest is trying to book.
- The Share step is greyed out. The experience is not active yet. Turn on Active at the top of the wizard.
- Guests see the experience list but not the event you promoted. That is expected for a private experience. Send them the share link instead.
- The confirmation email shows the table but not the event name. Turn on Show opening hour name on booking in Menu → Settings & add-ons → Bookings → Managing bookings. The name of the experience the guest picked is then included in the booking and in the email to both you and the guest.
If the experience is active and public but guests still see “fully booked”, or a party is refused even though your room looks empty, that has its own checklist: see why does my experience show fully booked?
The support team at Resos is always ready to help you with any questions about setting up your experiences. Do not hesitate to contact us at hi@resos.com, and we will make sure you get your first event live.


