


How to use Resos REST API
In this article
We provide API-credentials in order to broaden the spectrum of what can be done with Resos’ restaurant management system. When you use the Resos REST API to streamline your business, you can allow your existing systems to communicate directly with your booking system. The API is an add-on that can give you access to all relevant information from Resos. This includes guest-data, booking-data, or any other data that you might be interested in integrating into another system.
What Resos connects to already, and what you build yourself
Resos has no pre-built POS, EPOS, or till-system integration today. If you want your POS or EPOS to exchange bookings or guest data with Resos, that connection is built on this REST API, either by you or by your POS provider or an integration partner.
Stripe is also the only payment processor Resos supports. Online payment, prepayments, deposits and no-show fees all run through Stripe, and the API does not let you route guest payments through a different processor. When a booking needs prepayment or a no-show fee, a booking created through this API gets a payment deadline and is automatically deleted if the guest never pays. A booking created manually in the dashboard is never deleted this way, even when it needs payment.
The ready-made integrations that do exist are listed under Menu → Settings & add-ons → Integrations. Which ones appear there depends on the country your restaurant is registered in, so it is worth checking that page before you plan any custom work. If you want to connect Resos to another tool without writing code, look at Zapier in that same section first.
Generate keys directly in the system
In order to use our REST API, you need a private API key that will identify and authorize the request. In order to manage your API keys and generate new ones, you go to Menu → Settings & add-ons → Integrations → API. The next step is to click on Activate add-on and then on Generate key, and done!
The API keys give you access to all your data and your customers’ contact information, so be sure to keep it safe and only use it on the server-side code, and not show it to the user. Find out more about the guidelines by reading our API documentation.
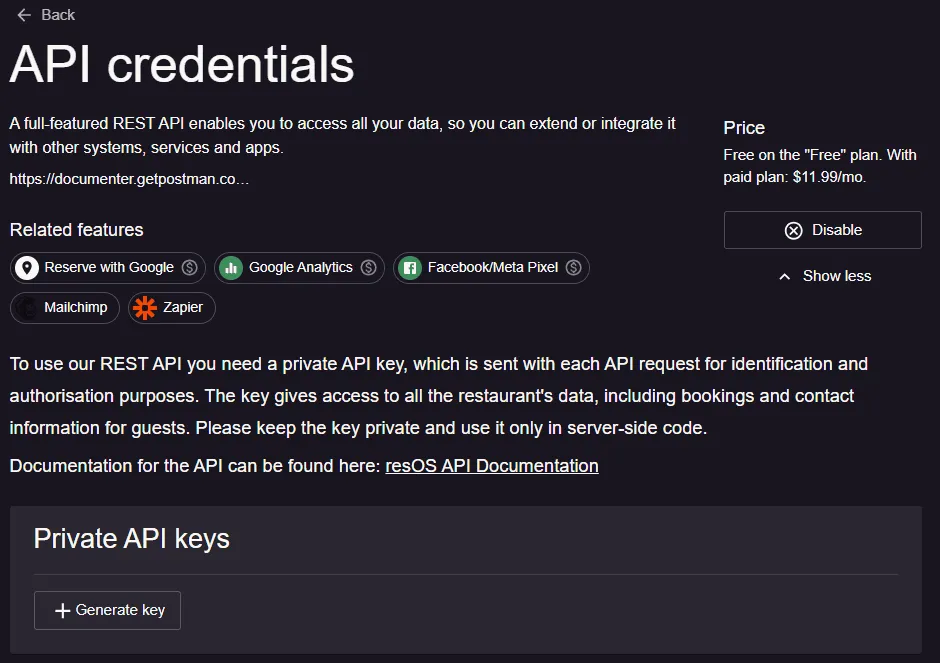
The API is a paid add-on, available on any of our paid plans (Basic, Plus, Unlimited). It requires both a paid plan and the API add-on activated.
Once you have a key, see Resos REST API capabilities and limits for what the API can do, how to poll it for changes, its rate limits and page sizes, and how to try it before you commit.
What to check when a request returns 401
A 401 response from the REST API carries one of three messages. Each points to a different fix.
| Message | What it means | Fix |
|---|---|---|
| Unauthorized: authorization undefined | The request has no Authorization header. | Send Authorization: Basic <base64 of your key followed by a colon>. With cURL, -u "YOUR_API_KEY:" builds it for you. |
| Unauthorized: API key is malformed (followed by a reminder to pass the key as the username and base64-encode it) | The header is there, but the part before the colon is not a 43-character key. Usually the key went in as the password, was not base64-encoded, or has extra characters or spaces. | Put the key in the username field, leave the password empty, and base64-encode YOUR_API_KEY:. Copy the key again from the API page without surrounding spaces. |
| Unauthorized: API key could not be validated | The key has the right shape, but Resos does not recognise it as an active key. The key was deleted, was copied incorrectly, or the API add-on is switched off, which disables every key. | Under Menu → Settings & add-ons → Integrations → API, check that the add-on is active. If the key is still listed, copy it again from there. If it is gone from the list, click Generate key and use the new one. |
A key you delete stops working immediately, and a new key does not carry over to systems that still hold the old one. Update every integration that used it.
If your request is answered with a 401 message that is not in this table, check that you are calling the REST API address given in the API documentation.
Please let us know at hi@resos.com if you have questions or if something you need is missing. We are extending the API as needed and per your request.


