


How to set up the custom fields add-on
In this article
- What is the custom field feature?
- Video walkthrough
- How to activate the custom fields feature
- Add your custom fields
- Editing an existing custom field
- Can guests pre-order food with their booking?
- Can I rename or remove a default field, like the message field?
- Activate customs fields for your opening hours
- Get an easy overview of bookings with custom fields
What is the custom field feature?
Custom fields are user-defined data fields that you can add to your reservation system in Resos. Unlike standard reservation information, such as date, time, and party size, custom fields let you gather specific details that are important to your restaurant. These fields can be highly adaptable and can be utilized in various ways, depending on your establishment’s requirements.
Read more about the custom fields add-on here. If you want a marketing opt-in checkbox specifically and you don’t use Mailchimp, a checkbox-type custom field is a common way to build one; see how to add a marketing opt-in checkbox to your booking form.
Video walkthrough
Prefer to watch instead of read? This short video shows how to activate the add-on and build your first custom fields:
How to activate the custom fields feature
Custom fields is a paid add-on and needs a paid plan. It is not available on the Free plan at all. Check out its pricing here.
To activate the custom fields add-on in Resos, simply follow these easy steps:
- Log in to your Resos account and access your dashboard.
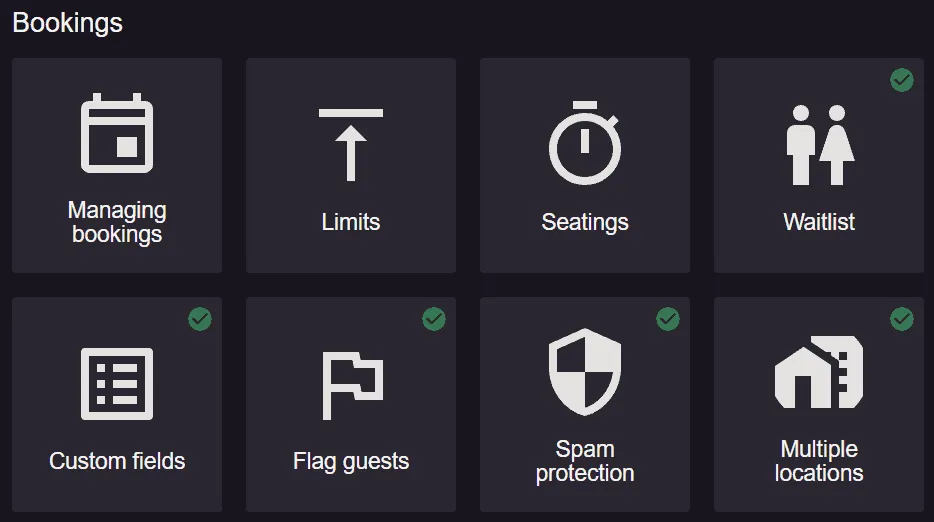
- Navigate to Menu → Settings & add-ons → Bookings.
- Look for the feature labeled “Custom fields” and click to activate it.
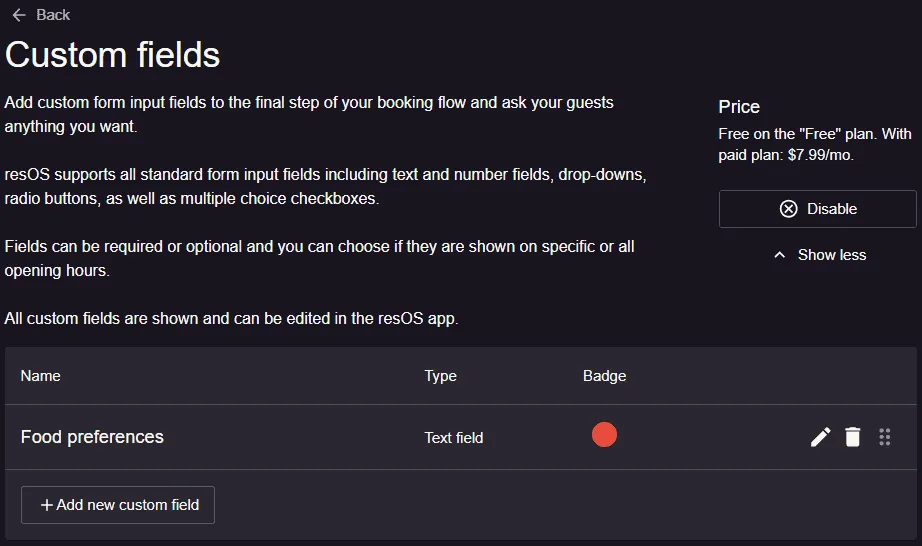
Add your custom fields
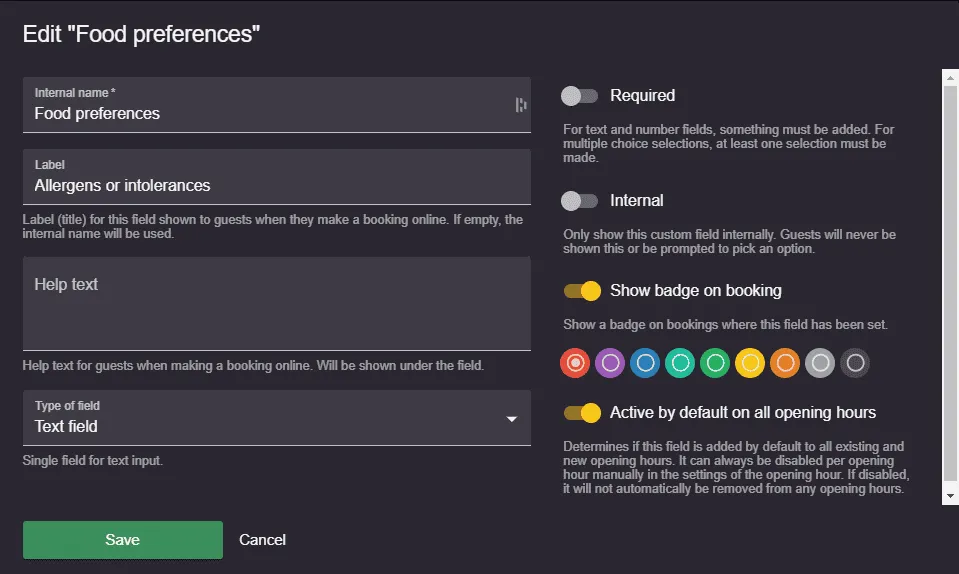
You have different options to choose from when you add custom fields to the last step of the booking flow. First, you should add a label name that is visible on the booking flow, but also the internal name that is shown on the reservations internally in the system. You also have the option to add a help text for the guests with more details about what this custom field is about.
We know that some custom fields might be very important for restaurants to have in the booking flow at all times, and some might be less significant. You can therefore pick if the custom field is required to be filled out or not.
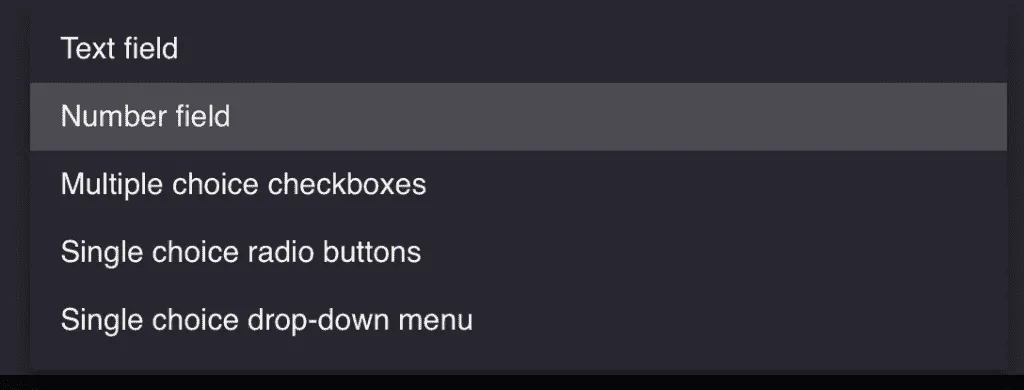
Resos supports all standard form input fields including text and number fields, drop-downs, radio buttons, as well as multiple-choice checkboxes. In “Type of field” you can select what kind of form input field is suitable for this custom field as shown in the image below.
Editing an existing custom field
To edit a custom field, go to your list of custom fields and click the edit (pencil) icon on the field you want to change. This opens the same form you used to create the field, with its current settings filled in.
Note: If you leave the Label field blank, guests see the internal name instead. Fill in the Label if you want guests to see different wording than your internal name.
Save your change and you’ll see a confirmation that the custom field was updated.
If an edit doesn’t seem to show up on your live booking page, try a hard refresh of the booking page and confirm you’re checking the correct opening hour and booking-page domain, since a field can be active on some opening hours but not others. If it still doesn’t appear, contact us at hi@resos.com.
Can guests pre-order food with their booking?
No. A booking has no menu or pre-order step, so guests cannot choose dishes and have them attached to the booking. What you can do is collect the guest’s request in a custom field and prepare from it: for example a drop-down or radio buttons for the menu choice, and a text field for allergies or dietary needs. Mark the field as required if you need an answer for every booking.
The answers show on the booking. With Show badge on booking switched on for a field, which it is by default, a colored badge also tells your team to look. Once you have created fields, they can be added to a single experience under Advanced → Custom Fields, so an event can ask its own questions. See how to set up and share Experiences. A custom field collects an answer only. It does not take an order or a payment for the food.
Can I rename or remove a default field, like the message field?
No. The guest’s name, email, phone number and the optional message to the restaurant are part of the standard booking form. None of them can be renamed, relabeled or replaced by a custom field, and the message field cannot be hidden.
Visibility of the two contact fields is the one exception, and it is a supported setting. Go to Menu → Settings & add-ons → Bookings and open Required contact information. Choosing E-mail (hide phone field) removes the phone field from the booking form, and choosing Phone (hide e-mail field) removes the email field. The Phone (hide e-mail field) option is only offered while the SMS messages add-on is active.
Note: Both options also decide how the guest is notified, because the remaining visible field is the one contact detail the booking then has. The Keep me updated via: checkboxes disappear from the booking form when either option is selected.
If you want to ask guests something different or in addition, add a custom field instead, as described in “Add your custom fields” above. A custom field appears alongside the standard fields, not in place of them.
Activate customs fields for your opening hours
You can choose if the custom field you add should apply to all opening hours by default or only specific ones. If you want the custom field to show on all opening hours, you should enable “Active by default on all opening hours”.
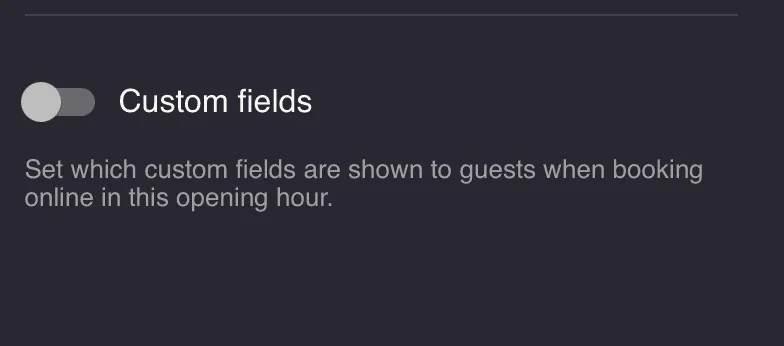
If you, on the other hand, only want the custom field to apply to some opening hours, you should go to Menu → Settings & add-ons → General → Opening hours → Fields and enable “Show custom fields”.
Get an easy overview of bookings with custom fields
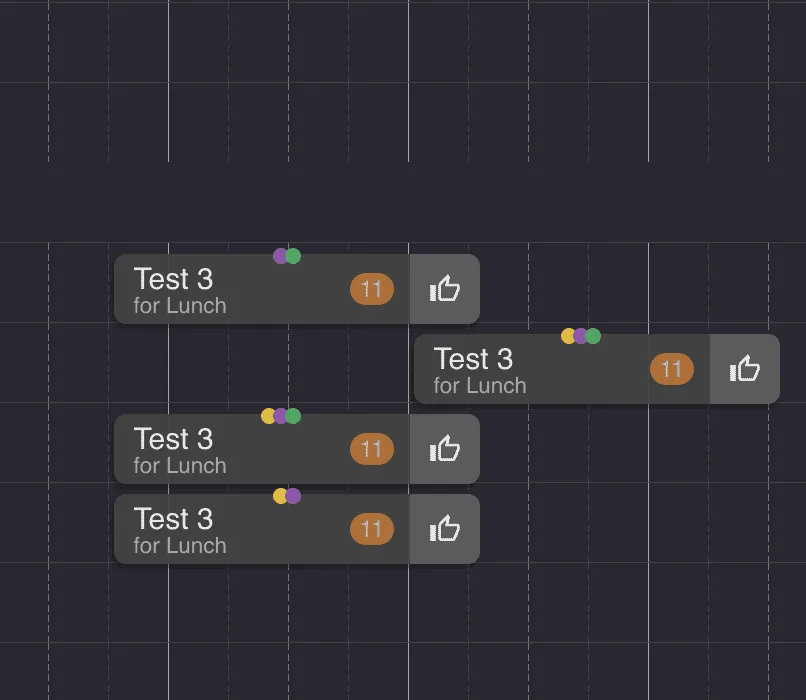
Regardless of what booking overview you use in the system to see and handle your bookings, you will get an easy overview of bookings that have custom fields. The colored badges help you easily spot what bookings have custom fields that you should be aware of. When you click on the colored badge or open the booking, it will clearly showcase what custom field is applied to this booking.
The support team at Resos is always ready to help you with any questions or issues you may have about the system. Do not hesitate to contact us at hi@resos.com, and we will make sure to help you get started in the best way possible. We look forward to hearing from you.


