How to import customers
Moving to a new system can feel like a big step, but we’ve made it simple to bring your history with you. Our new import tool allows you to easily upload your existing customer lists from a previous platform. Get set up in just a few minutes by following the steps below.
Note: Bookings and customers are imported separately. Importing bookings brings in your booking history with each guest’s details on the booking, but it does not build customer profiles. To bring over your guest database as well, run the customer import too. If you only have one combined file, you can use the same file for both imports and just map the relevant columns each time.
To find these features, navigate to Settings -> Advanced and find the buttons for Import Customers.
Please note that while it is functioning on Mobile devices, we recommend you use a wide screen device for this (laptop, PC, tablet).
You can import the following fields:
| Name | Required | Format | Default value(s) |
| Name | Yes | Full name or first name + last name | |
| No | None | ||
| Phone | No | None | |
| Tags | No | Comma-separated tags | None |
| Address 1 | No | None | |
| Address 2 | No | None | |
| Address 3 | No | None | |
| Postal / zip code | No | None | |
| Country code | No | 2-letter country code, or full English name of the country | None |
| Note | No | None | |
| Created at | No | Timestamp, in YYYY-MM-DDTHH:mm:ss | Time of import |
Step 1: Upload Your File
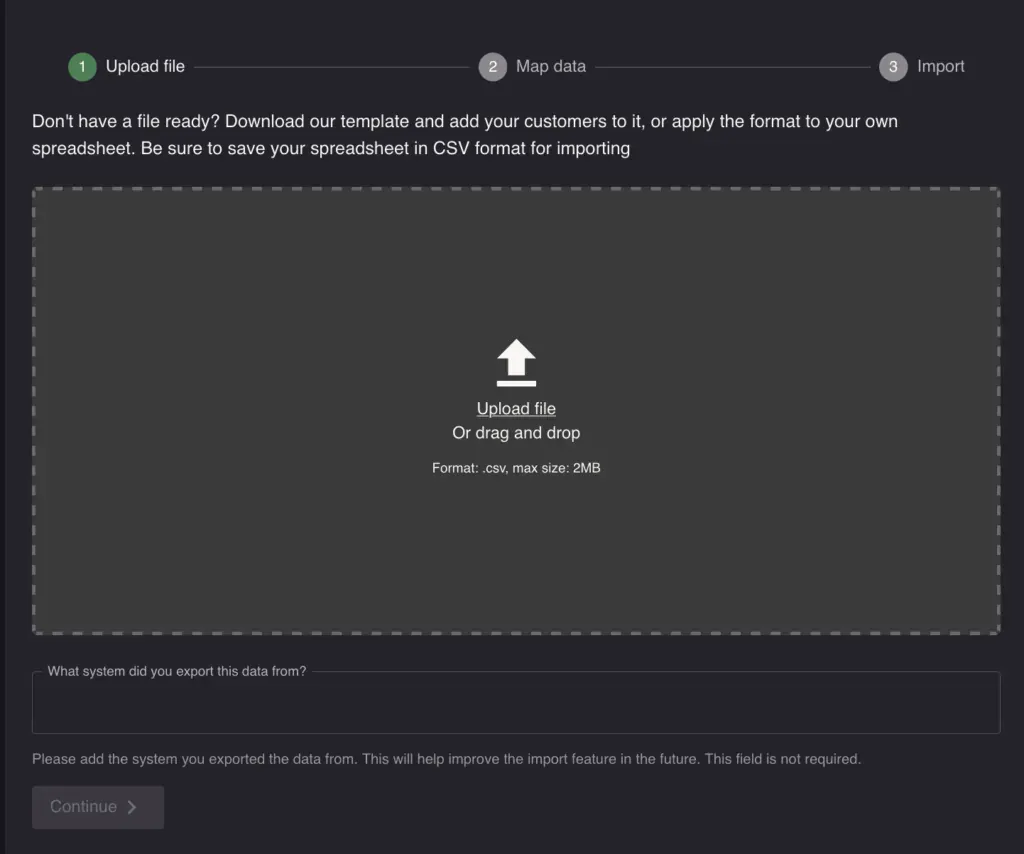
First, you’ll need your customer data in a CSV (Comma-Separated Values) file. Most platforms allow you to export your data in this format.
- Click the “Upload file” button and select your CSV file, or drag and drop it from your PC.
- To ensure a smooth import, your file must contain a column for Name.
- Unsure about the format? You can download our template to see how your file should be structured.
Step 2: Match Your Data
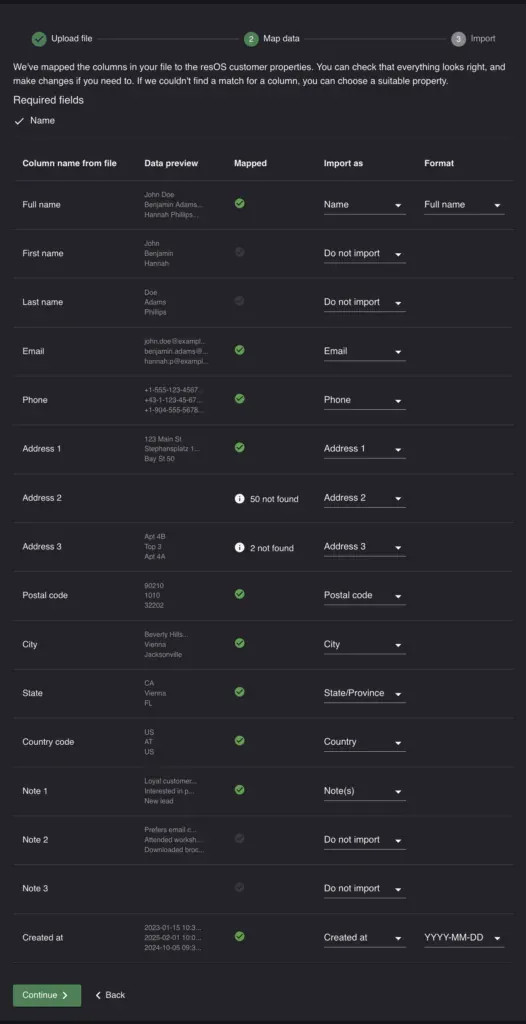
This is where you’ll match the columns from your file to the booking fields in our system. We call this “mapping.” Our system will try to automatically match your columns, but it’s always a good idea to double-check that everything is correct.
- Check the Mapped Columns: Look down the list. For each “Column name from file” (e.g., “Name”, “Email”), check that the value in the “Import as” dropdown is correct (e.g., “Name”, “Email”).
- Assign Missing Fields: If our system missed the required “Name” field, click the dropdown menu next to it and select “Name”. A red warning message will appear if any required mappings are missing.
- Verify the Format: For fields like dates, times and names, you can specify the format. For a “Date” field, ensure you’ve selected the correct format, such as
YYYY-MM-DD, to match your file. For a name field, choose between “Full name” or “First name, Last name”.
Step 3: Finalize Your Import
Once you’re happy with your data mapping and there are no warnings, click “Continue” to start the import.
The system will process your file, which may take a few moments. When it’s done, you’ll see a summary showing:
- How many customers were successfully imported.
- How many customers failed to import.
If any customers failed, you can download a new CSV file containing only the failed rows. This file will include an extra column explaining the reason for the failure (e.g., “Invalid date format,” “Missing guest name”), making it easy for you to fix the issues and try again.
If you need to update or re-import your data, you will see an option to “Replace existing” when you upload your file.
Please be aware that this option replaces all previously imported customers with the data from your new file. Any customers you have created manually or through your booking flow within our system will not be affected.