


How to disable Reserve with Google
In this article
If you’re looking to disable the Reserve with Google add-on from your Resos app, you’re in the right place. Follow these simple steps to deactivate the integration quickly and efficiently.
Step 1: Access the booking dashboard
Firstly, log in to your Resos account. Once logged in, you’ll be directed to your main dashboard. This is your control center, where you can manage all your bookings and settings.
Step 2: Navigate to Settings
On your dashboard, go to Menu → Settings & add-ons → Integrations. This section is dedicated to all Resos’ integrations.
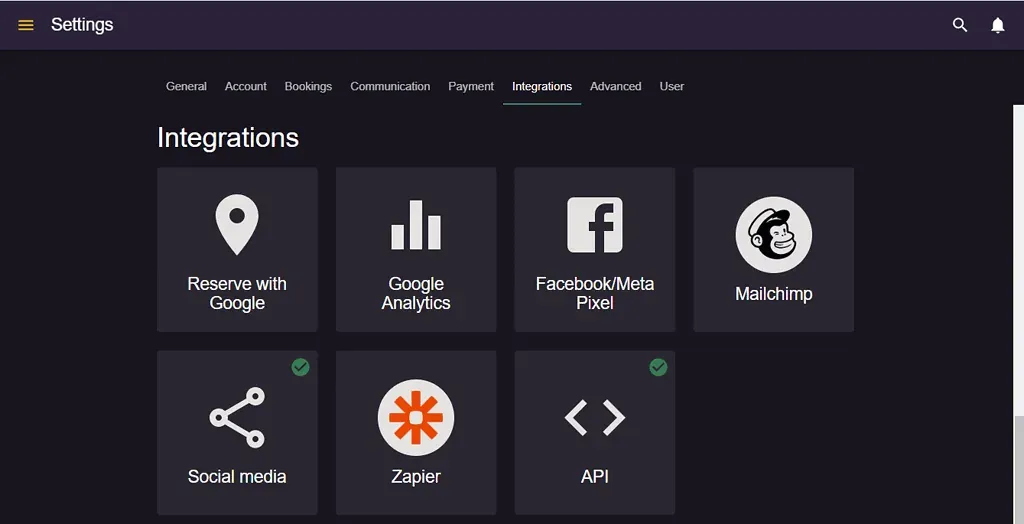
Step 3: Disable the integration
Click on the Reserve with Google add-on, and then on the Disable button. Clicking this button will deactivate the Reserve with Google integration from your Resos app.
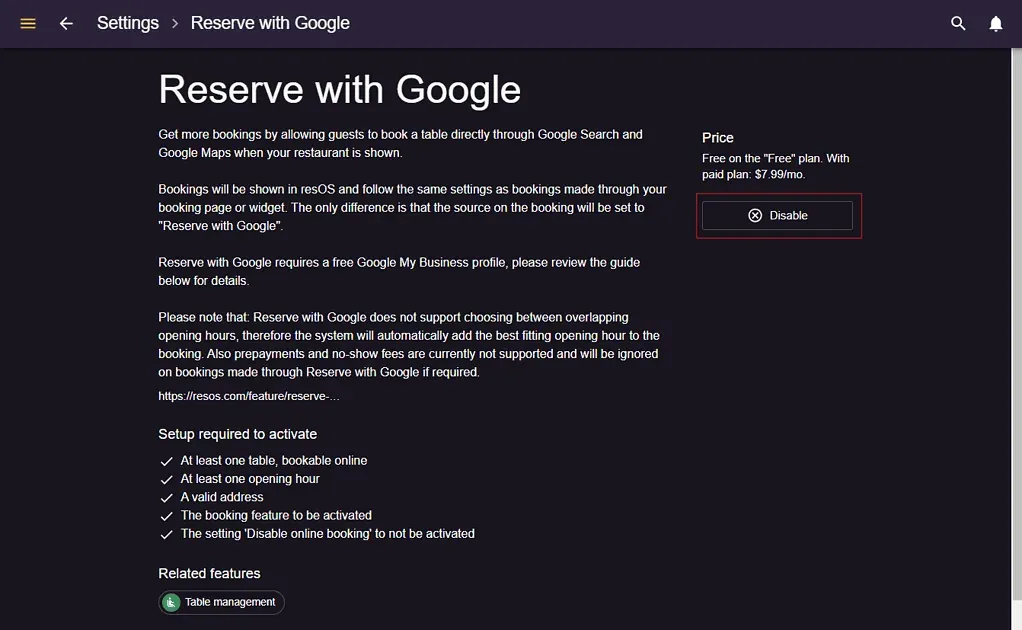
Step 4: Confirmation
After clicking the Disable button, a confirmation prompt may appear. Confirm your choice to ensure the integration is fully disabled.
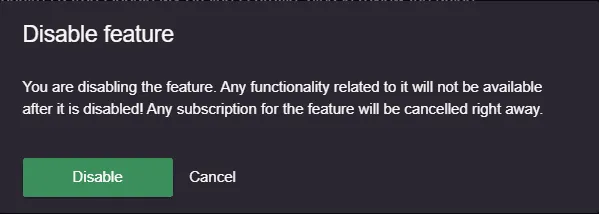
Final Check
Once you’ve completed these steps, it’s a good idea to check that the integration has been disabled. You can do this by attempting to make a test reservation through Google or by checking the status under Menu → Settings & add-ons → Integrations → Reserve with Google. If you were on a paid plan initially and you were paying for the add-on, you will stop the payments as soon as the add-on is disabled.
NOTE: It might take up to 48 hours for the integration to be fully disabled. That means that after 48 hours the booking button will disappear from your Google Business profile.
What if there is no option to disable it?
If there is no Disable button on the add-on page, or no Reserve with Google card at all, the add-on is not active on your account and there is nothing for you to switch off. There are three common reasons for this.
- The add-on was never switched on. Open the add-on page. If it shows an Activate add-on button rather than Disable, it has never been active on your account. Reserve with Google needs a paid plan, so it is very unlikely to have been activated on a free plan.
- Your country is not supported. The add-on card is only shown to restaurants in the countries Google supports. See the Reserve with Google FAQ for the list.
- The link on Google was added by hand. A “Reservations URL” typed into your Google business profile is not the Reserve with Google integration, even though it points at Resos. We did not add it and we cannot remove it. Sign in to your Google business profile and clear the same “Reservations URL” field, as described in our guide on adding your booking link to Google.
If none of these match your situation, email us at hi@resos.com with your restaurant name and we will check what is connected to your account.
Re-activating Reserve with Google
If you decide to re-enable the Reserve with Google add-on at any point, you can easily do so. Simply follow the setup and integration guide available on our page here. This guide will provide you with step-by-step instructions to reactivate and configure the integration seamlessly, but keep in mind, activating it might also take up to 48 hours.
If you encounter any issues or need further assistance, our Resos support team is here to help. You can contact us through our support page or email us directly at hi@resos.com. Thank you for choosing Resos, we’re committed to making your restaurant management experience smooth and efficient.


