


What the different booking status colors mean
In this article
We have made it simple for every employee in your restaurant to get a visual overview of all bookings - just at a glance. The smart color code for all booking statuses makes handling bookings more colorful, literally. Green? Red? Grey? Read the support page below and understand the different booking status colors you see on the different booking views.
Booking status colors on the visual floor plan
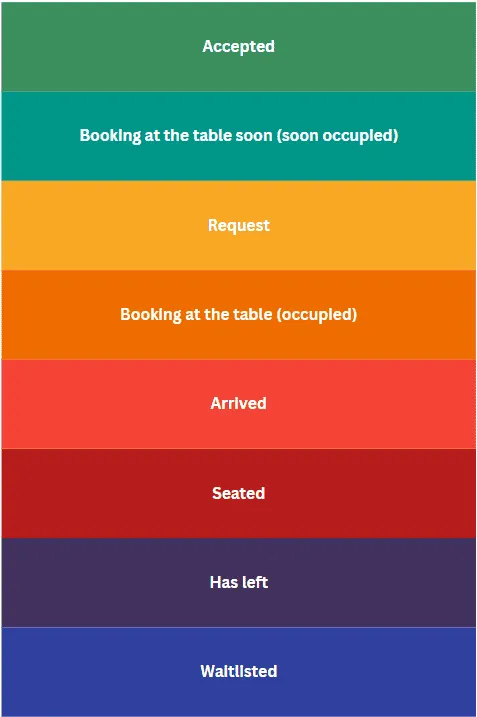
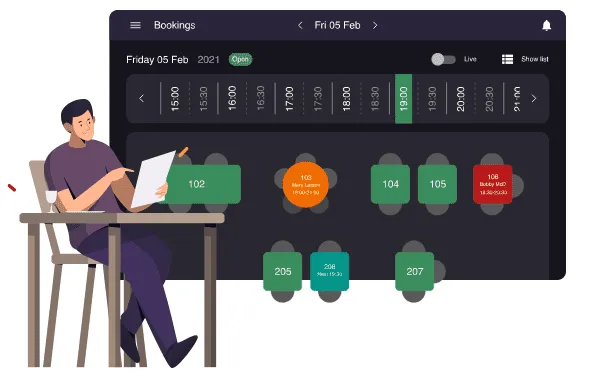
The picture below illustrates the color code from the floor plan and its purpose is to assist all users of the system when managing tables. This is one single color system, not two: every table is colored based on what is happening with the booking closest to the time you have selected (or the current time, if you are in “Live” mode).
- Green = the table is vacant at the selected time: nothing is booked, or the next booking is still further away than the normal booking duration.
- Yellow = a booking on that table is still a request, waiting for you to accept or decline it.
- Turquoise = a booking is coming up soon (within the normal booking duration of the selected time), the table will shortly be occupied.
- Orange = the table is occupied or about to be: an accepted booking whose time covers the selected time, or a booking starting within the next 15 minutes.
- Light red = the guest for the booking on that table has arrived.
- Dark red = the party is seated.
- Aubergine, a dark purple = the party has left.
- Blue-grey = the booking is closed, so the table is finished with it.
The color codes are designed to make it easy for you to quickly spot the difference between tables that are vacant (green), coming up soon (turquoise), occupied (orange or one of the two reds), finished (purple or blue-grey), or still waiting on a decision from you (yellow).
Two things the colors do not show. Cancelled, declined, no-show and deleted bookings are not drawn on the floor plan at all, so their table stays green. And a booking that has not been accepted yet, other than a request, has no color of its own here, so its table shows as green (vacant) or turquoise (coming up soon) even though the booking is in your list.
A table also turns light red or dark red for the next booking on it, not only the current one, as soon as those guests have arrived or been seated.
Here is how to get started with setting up your visual floor plan. 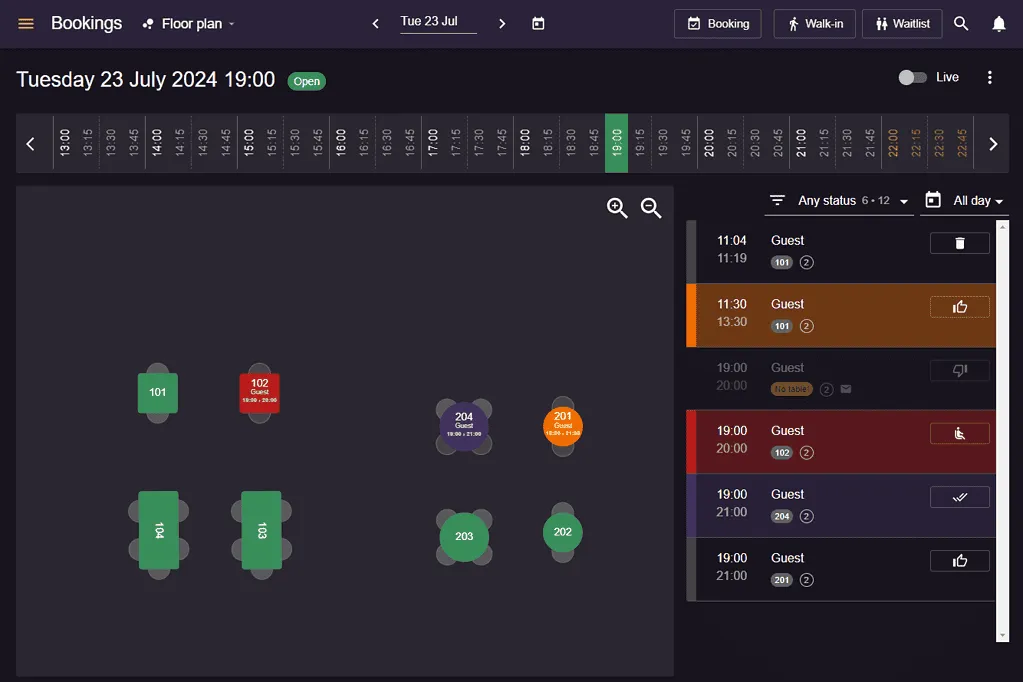
Booking status colors on the list and schedule view
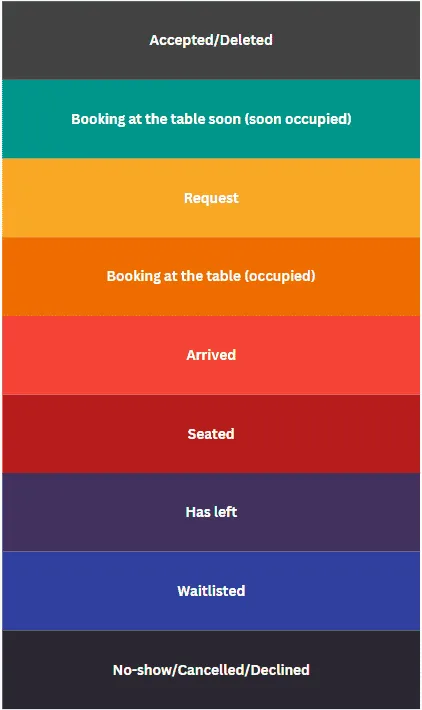
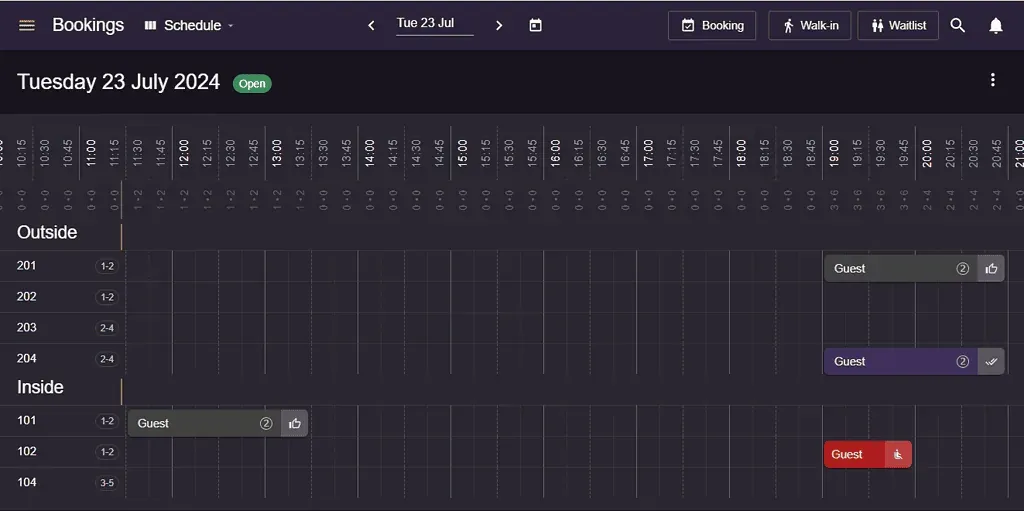
The picture below illustrates the colors for booking statuses shown in the list and schedule view. To find these views, simply go to Menu and click on Schedule or List from the upper left side of the screen and explore all your bookings of the day.
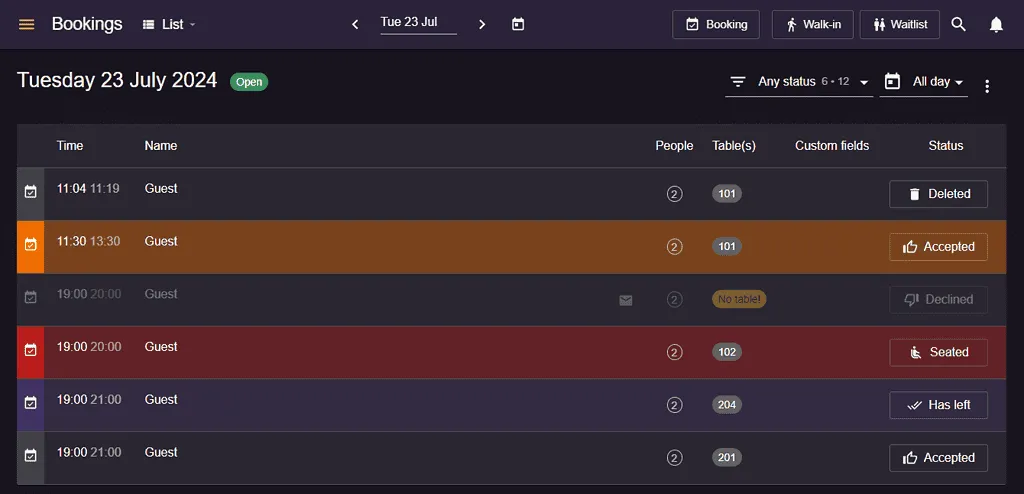
As you can see above, yellow means that a table has been requested, grey indicates that the booking has been accepted but also deleted, red indicates that the guest has arrived to your restaurant and so on. If you have the same color for different booking statuses, don’t worry, their icons and text will signal which booking status is applicable. Explore all the status colors below or check them out in the system.
The booking timer on the list, schedule, and booking details
Next to the colors you may also see a small clock on a booking. That is the booking timer, and it counts live so your staff can see at a glance whether a table is running to plan. It appears on the booking list, the schedule, and the booking details, and it reads differently depending on the booking status:
- Accepted, and the booking time has passed. For the first five minutes it says “Due now” in gray. After that it shows how late the guest is, in yellow, and it switches to red once the guest is more than 15 minutes late.
- Request, Pending confirmation, Waitlist or Arrived. It shows the status and how long the booking has been in it, in gray.
- Seated. It shows how long the party has been at the table. In the last 15 minutes of the booked duration it adds the time left and turns yellow. Once the booked end time has passed it shows how far over the table is running, in red.
Bookings that are finished or gone (Has left, Cancelled, No-show, Declined, Deleted and Closed) get no running timer. On the booking details the clock stays as a gray icon, so you can still open the status history. Hover over the clock to see the booking’s journey through its statuses, with the time of each change and how long each step took.
Seating a party late does not move the end of their table time. The remaining time is always measured against the booking’s planned end, so a late seating simply has less time left before the timer turns yellow.
How to hide the booking timer
If you would rather not see it, you can switch the timer off for the whole restaurant:
- Go to Menu → Settings & add-ons → Bookings → Managing bookings.
- Scroll to the Managing bookings section on that page.
- Switch on Hide booking timer.
- Click Save.
The clock then disappears from the booking list, the schedule and the booking details for everyone in your restaurant. You can switch it back on the same way at any time.
Do not see the toggle? The Managing bookings section on that page is only shown when the Table management add-on is active. If you do not use table management, reach out to us and we will help.
Do you have any questions about the color codes or do you need help with setting up your floor plan? Our wonderful support team is always ready to assist you. Reach us at hi@resos.com and we will be ready to help!


