


How to get bookings through Facebook & Instagram
In this article
With this guide, we will walk you through how easy it is to add a reserve button to your Facebook & Instagram page. It is a simple way to increase bookings, and it won’t take more than a couple of minutes.
Prerequisite: A restaurant Facebook page must be created and live before installation. If you would like to add the “Reserve” button to Instagram, please make sure you have an Instagram business profile, and that it is linked to your Facebook page before continuing.
Beyond the Facebook page, the dashboard checks the same requirements it checks for Reserve with Google before the button can go live, and tells you which ones are missing:
- At least one area and one table set to bookable online
- At least one opening hour
- A complete address (street, postal code, city and country)
- The booking feature switched on
- The setting “Disable online booking” switched off (shown in the dashboard as Disable booking page & widget)
This quick video guide will help you set up the Reserve button on your Facebook page.
Step 1
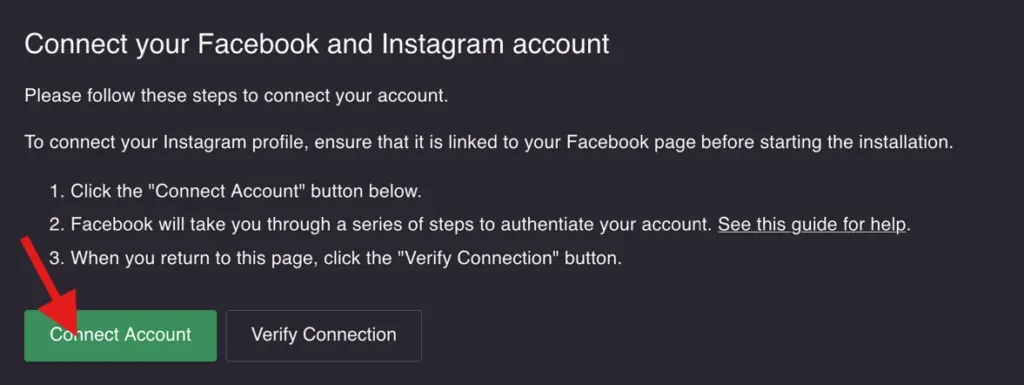
Go to your Resos restaurant → Settings & add-ons → Integrations → Reserve with Facebook & Instagram then click Activate add-on. After that click Connect Account. The add-on carries a BETA badge in the add-ons list, which is expected: it is live and usable, and we are still refining it.
Step 2
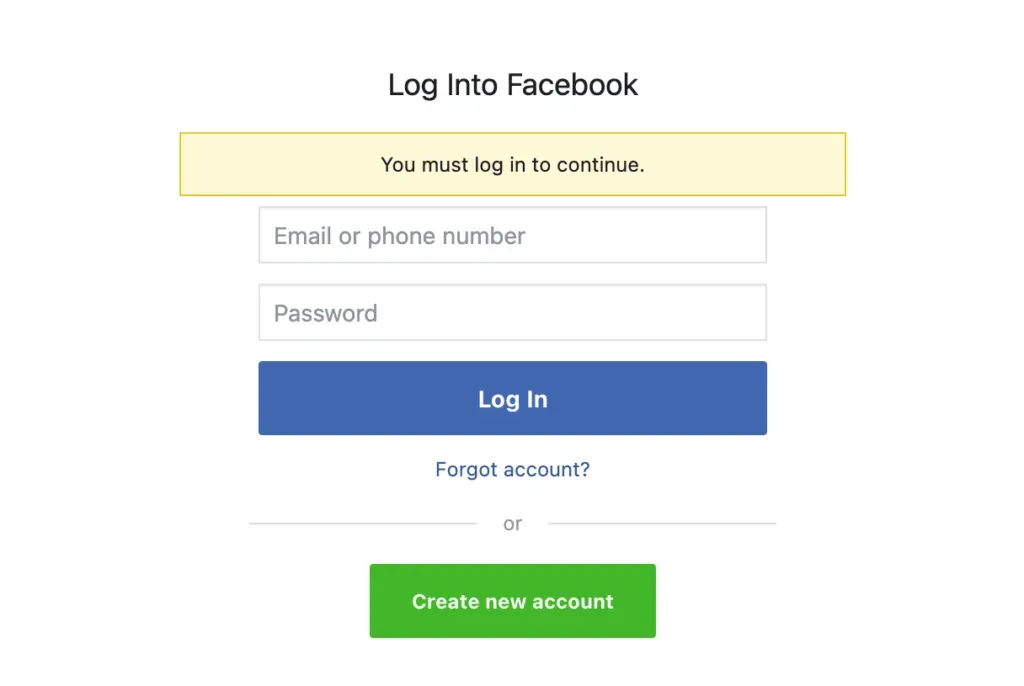
Log in to Facebook with an account that is authorized to manage the Facebook Page you would like to connect to, or choose “Continue” if you are logged in already:
Step 3
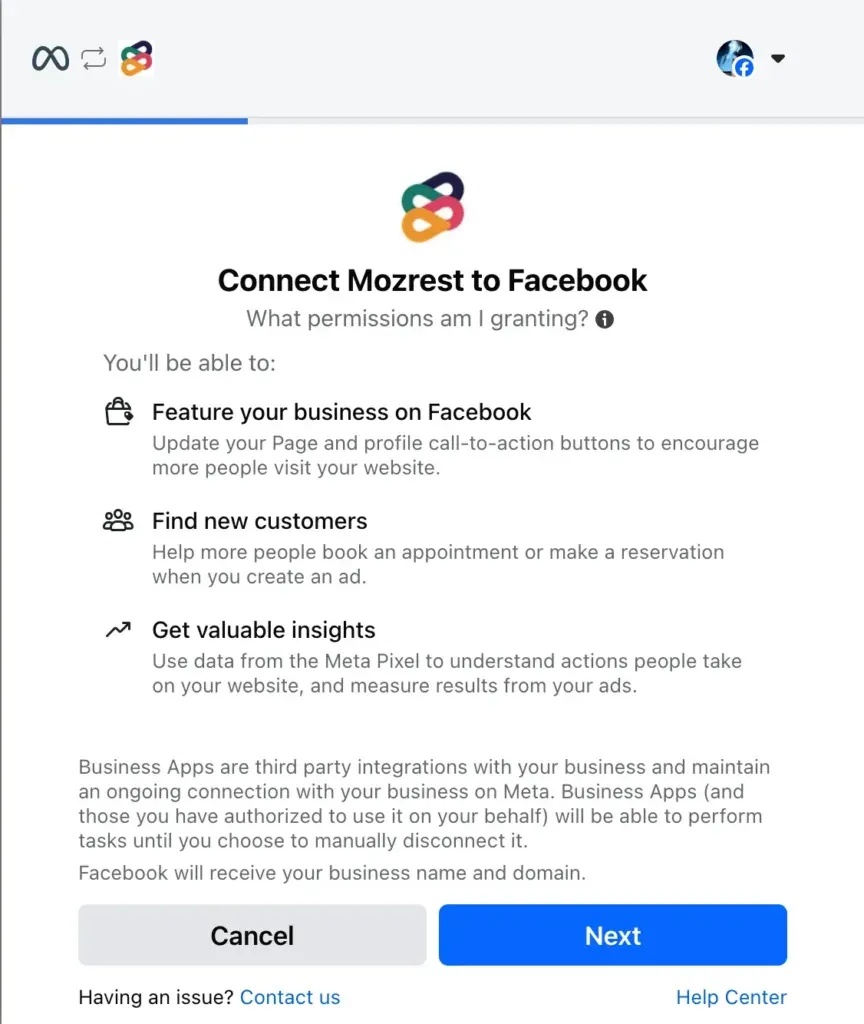
To enable the “Reserve” button on your Facebook and Instagram, we use a third party integration partner.
Click “Next” to accept the integration.
Step 4
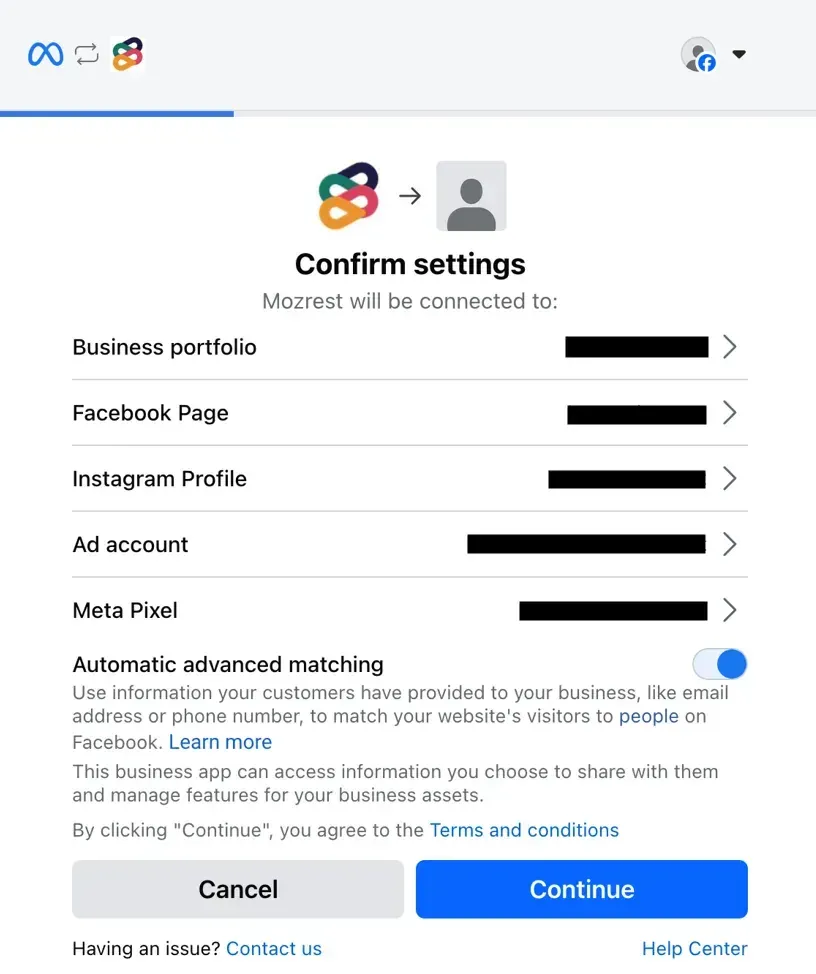
Choose the “Business portfolio”, “Facebook Page”, “Instagram Profile”, “Ad Account” and “Meta Pixel” you would like to use for the connection.
Facebook will guide you through the creation of these if you don’t yet have them available. As part of that process, Facebook may take you away from this step. To return, restart from “Step 1” of this guide.
Click “Continue”:
Step 5
Click “Next” to allow our integration partner to add the “Reserve” button:
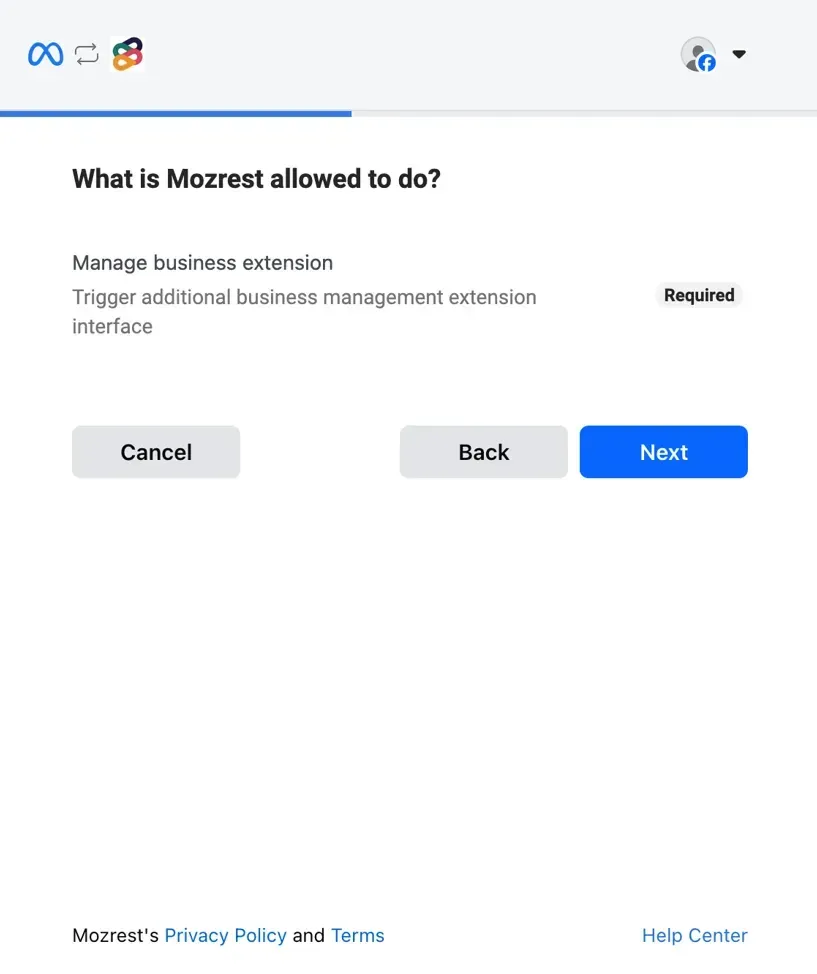
Step 6
Click “Done” to finish the connection:
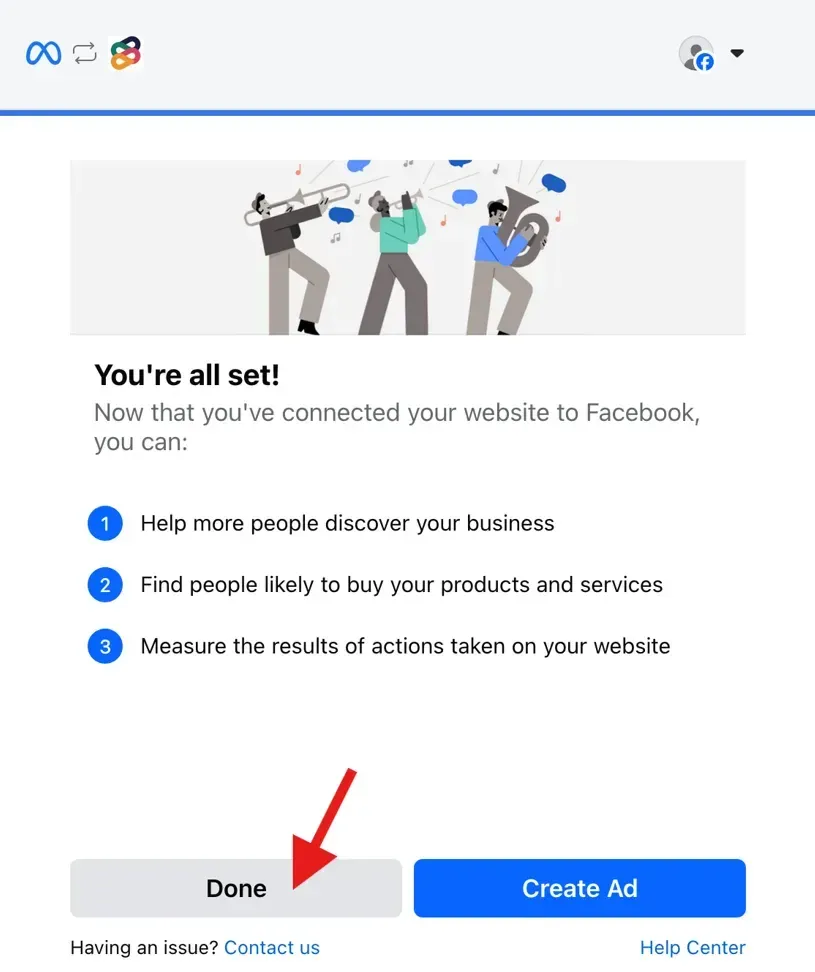
Step 7
Facebook will show you a confirmation that the connection was successful.
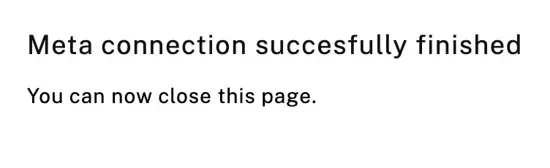
Please return to the “Reserve with Facebook & Instagram” add-on and click “Verify Connection”:
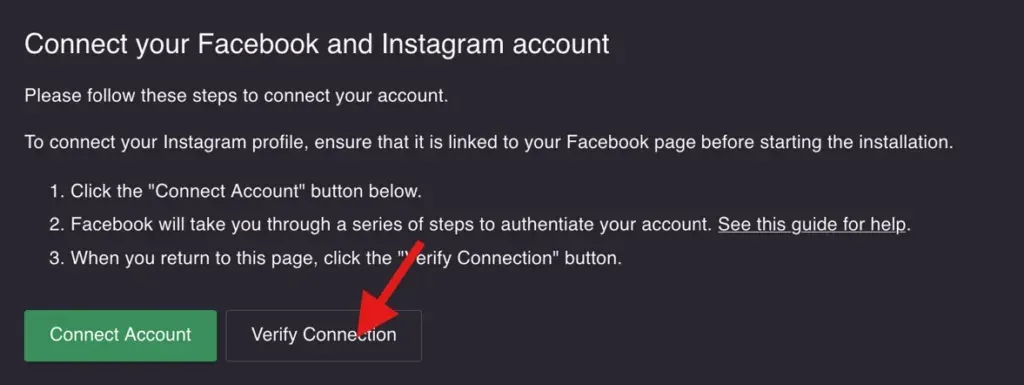
If the “Reserve” button was added successfully the screen will change to acknowledge the connection.
Please note that in some cases it takes a few minutes for Facebook & Instagram to add the “Reserve” button. So if the connection cannot be verified, please try again in 5 minutes.
The screen will change to confirm that the connection is successful.
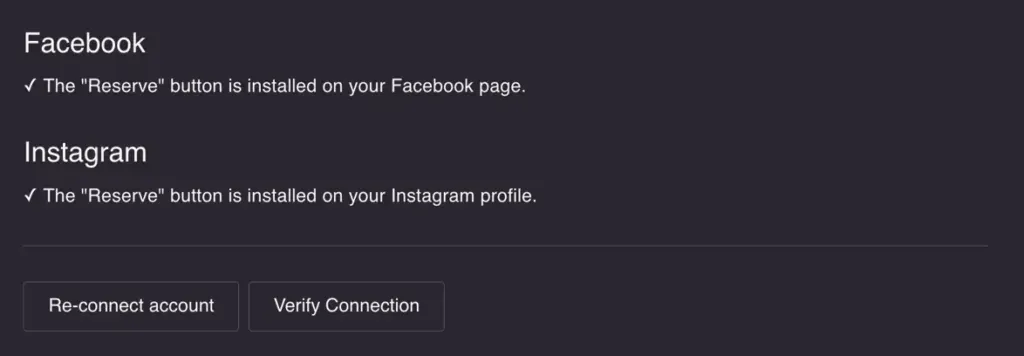
Done
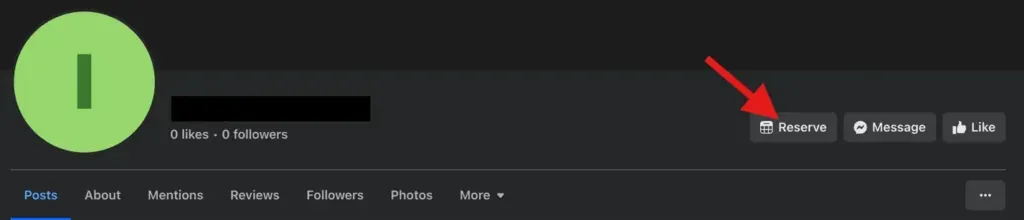
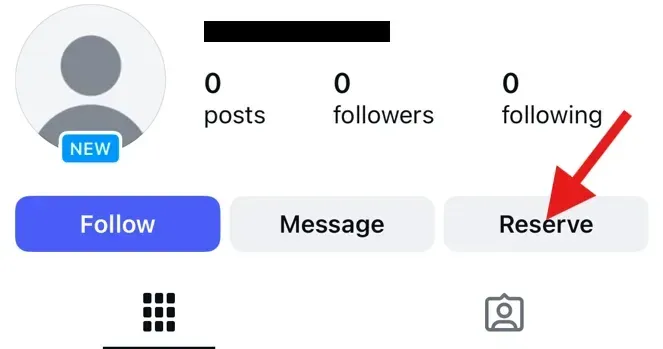
The “Reserve” button has been added to your Facebook page and Instagram profile.
Please note that the “Reserve” button on your Facebook page will not be shown to page administrators. So use another Facebook user to try the button.
Instagram only shows the “Reserve” button in their app, it will not be available on their website.
How bookings from Facebook and Instagram are handled
Bookings that arrive through the “Reserve” button follow the same rules as bookings from your booking page or widget. Your own booking settings decide how they behave, with the exceptions noted below.
Whether a booking is accepted straight away or arrives as a request you accept or decline is decided by your Accepting new online bookings setting, under Menu → Settings & add-ons → Bookings → Managing bookings. If that setting has you accepting bookings manually, Facebook and Instagram bookings arrive as requests too, and they wait for you.
In your booking list these bookings carry a Facebook or Instagram icon. Open the booking and the Source field reads “Reserve with Facebook” or “Reserve with Instagram”, so you can tell them apart from bookings made on your own page.
Note: Prepayments, no-show fees, waitlist and custom fields are currently not supported on bookings made through Reserve with Facebook & Instagram.
The language your guests are contacted in
A booking made through Facebook or Instagram usually carries the guest’s language, and that is the language the guest receives their confirmation and reminder messages in. If it is a language Resos does not support, the guest is written to in English instead. If the booking arrives with no language at all, your restaurant’s own language setting is used.
How to disable Reserve with Facebook & Instagram
- Go to Menu → Settings & add-ons → Integrations → Reserve with Facebook & Instagram.
- Click More under the add-on description, then click Disable.
- Confirm in the prompt that appears. Any subscription for the add-on is cancelled right away.
Disabling does more than switch off a setting: it removes the connection to your Facebook page and Instagram profile through our integration partner, so the “Reserve” button stops being shown.
Note: Turning it back on later is not a single click. You have to reconnect your Facebook account and run through Step 1 to Step 7 of this guide again.
Bookings you already received through Facebook and Instagram stay in Resos and are unaffected.
Still need help?
If the “Reserve” button does not appear or disappear as expected, or you are unsure what is still connected to your account, email us at hi@resos.com with your restaurant name and we will check it for you.


