In this article
BookItPlease is a booking marketplace where diners can discover restaurants and reserve a table at a reduced price. The Resos integration lets you choose the offer that works for your restaurant, then receive BookItPlease reservations in the same booking calendar your team already uses.
How does BookItPlease work with Resos?
You activate BookItPlease directly in Resos. Once enabled, the partner connection can check your restaurant’s availability and create bookings in Resos. Bookings from the integration are identified as BookItPlease bookings, so your team can see where they came from.
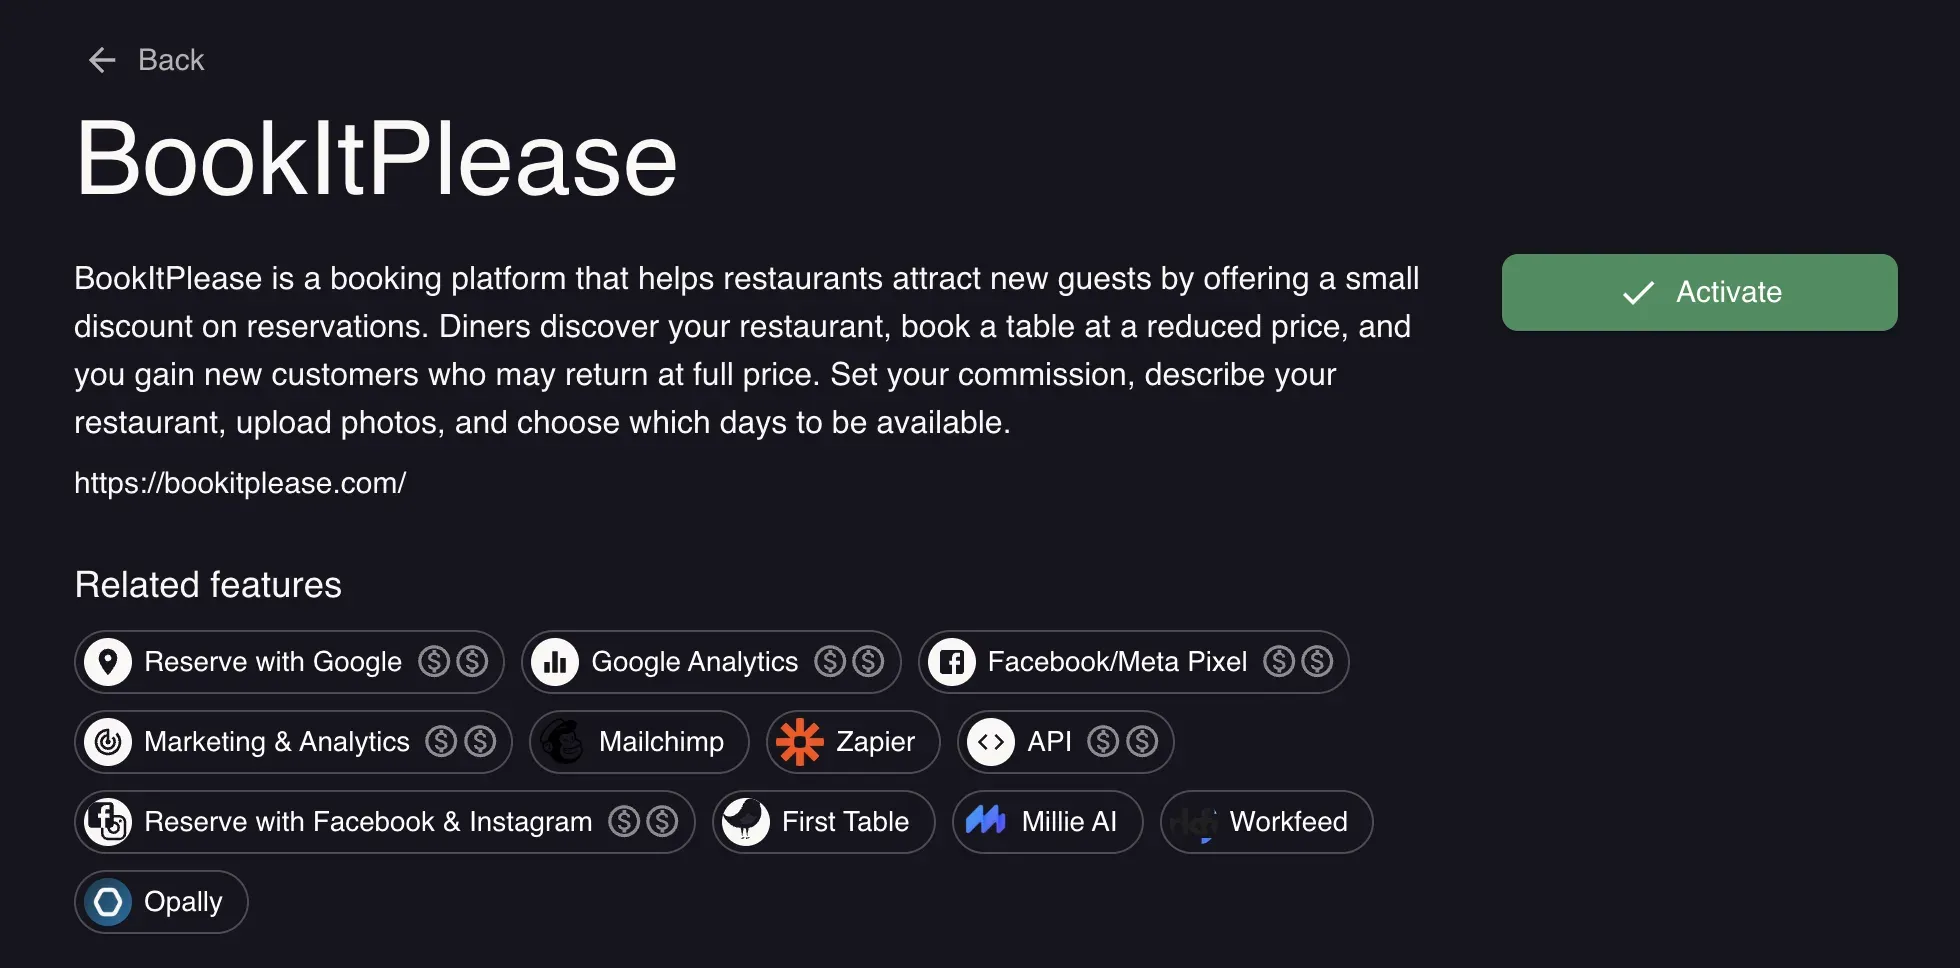
You stay in control of the restaurant information and offer shared with BookItPlease:
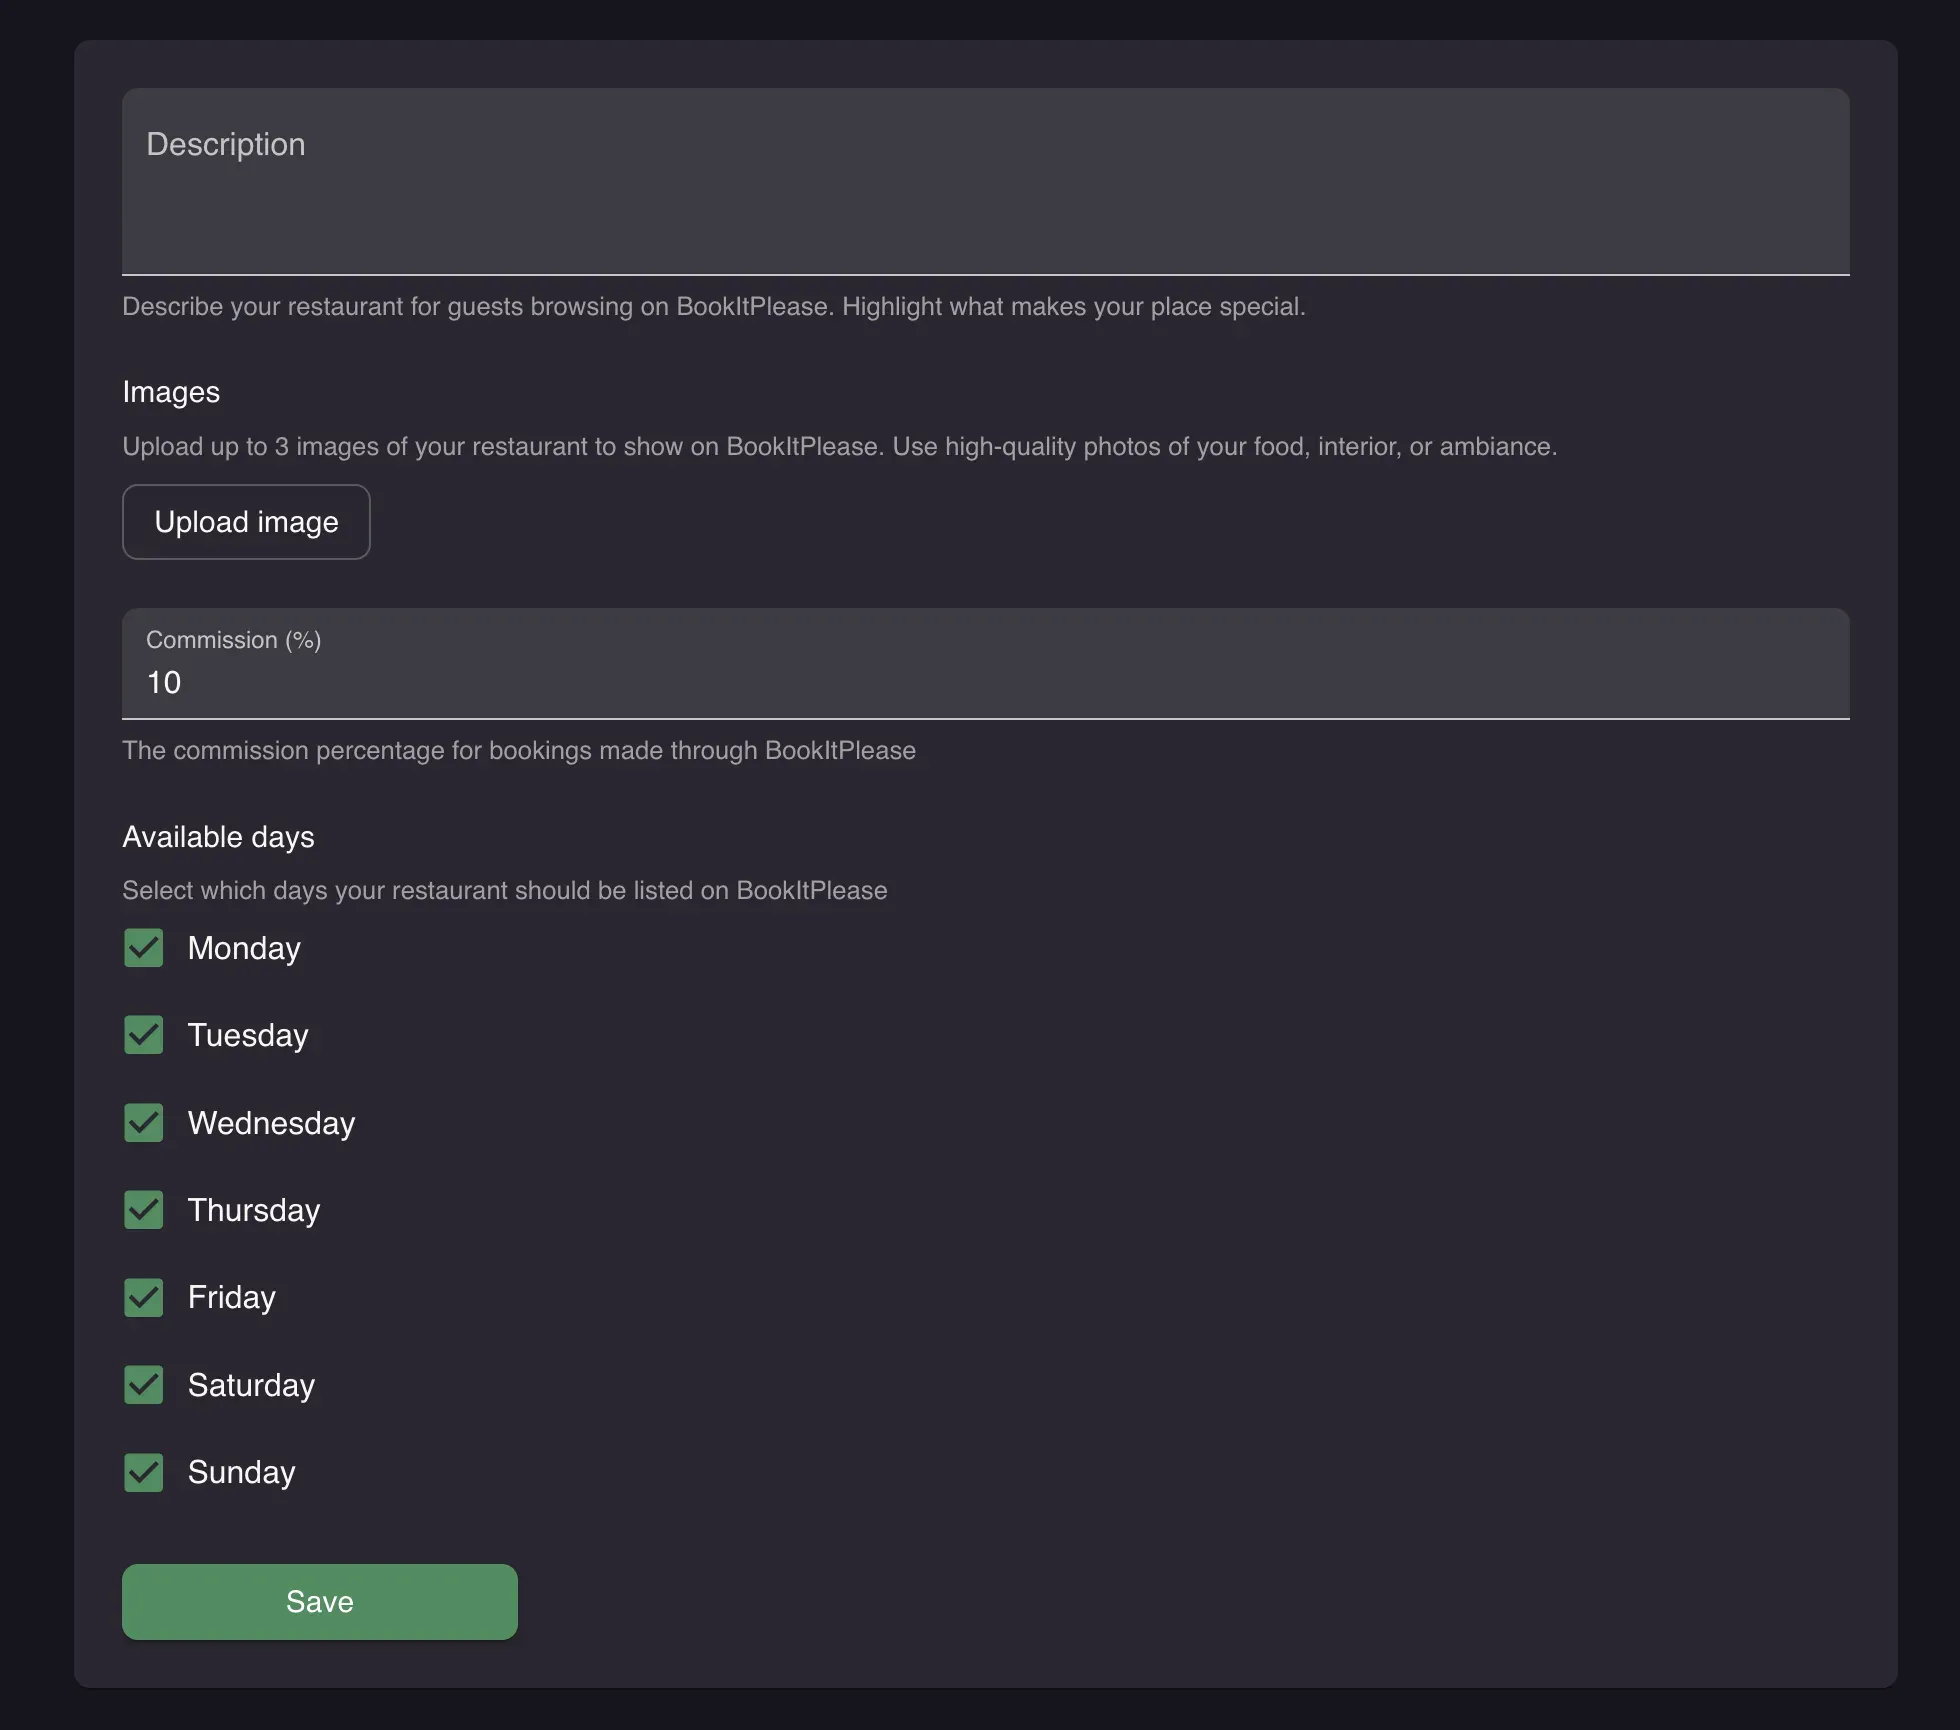
- Write the restaurant description shown to diners.
- Upload up to three photos of your food, interior, or atmosphere.
- Choose which days your restaurant is available on BookItPlease.
- Set the commission percentage for bookings made through BookItPlease.
Only restaurants that actively enable the add-on are available through the partner connection.
Who can use the integration?
BookItPlease is currently available to Resos restaurants in the United Kingdom. You need the Restaurant Booking product active in Resos, but you do not need to buy the separate Resos API add-on.
There is no additional Resos subscription fee for activating BookItPlease. You choose the commission percentage that applies to bookings from the marketplace. Review the BookItPlease terms and conditions before activating the integration.
Easy setup
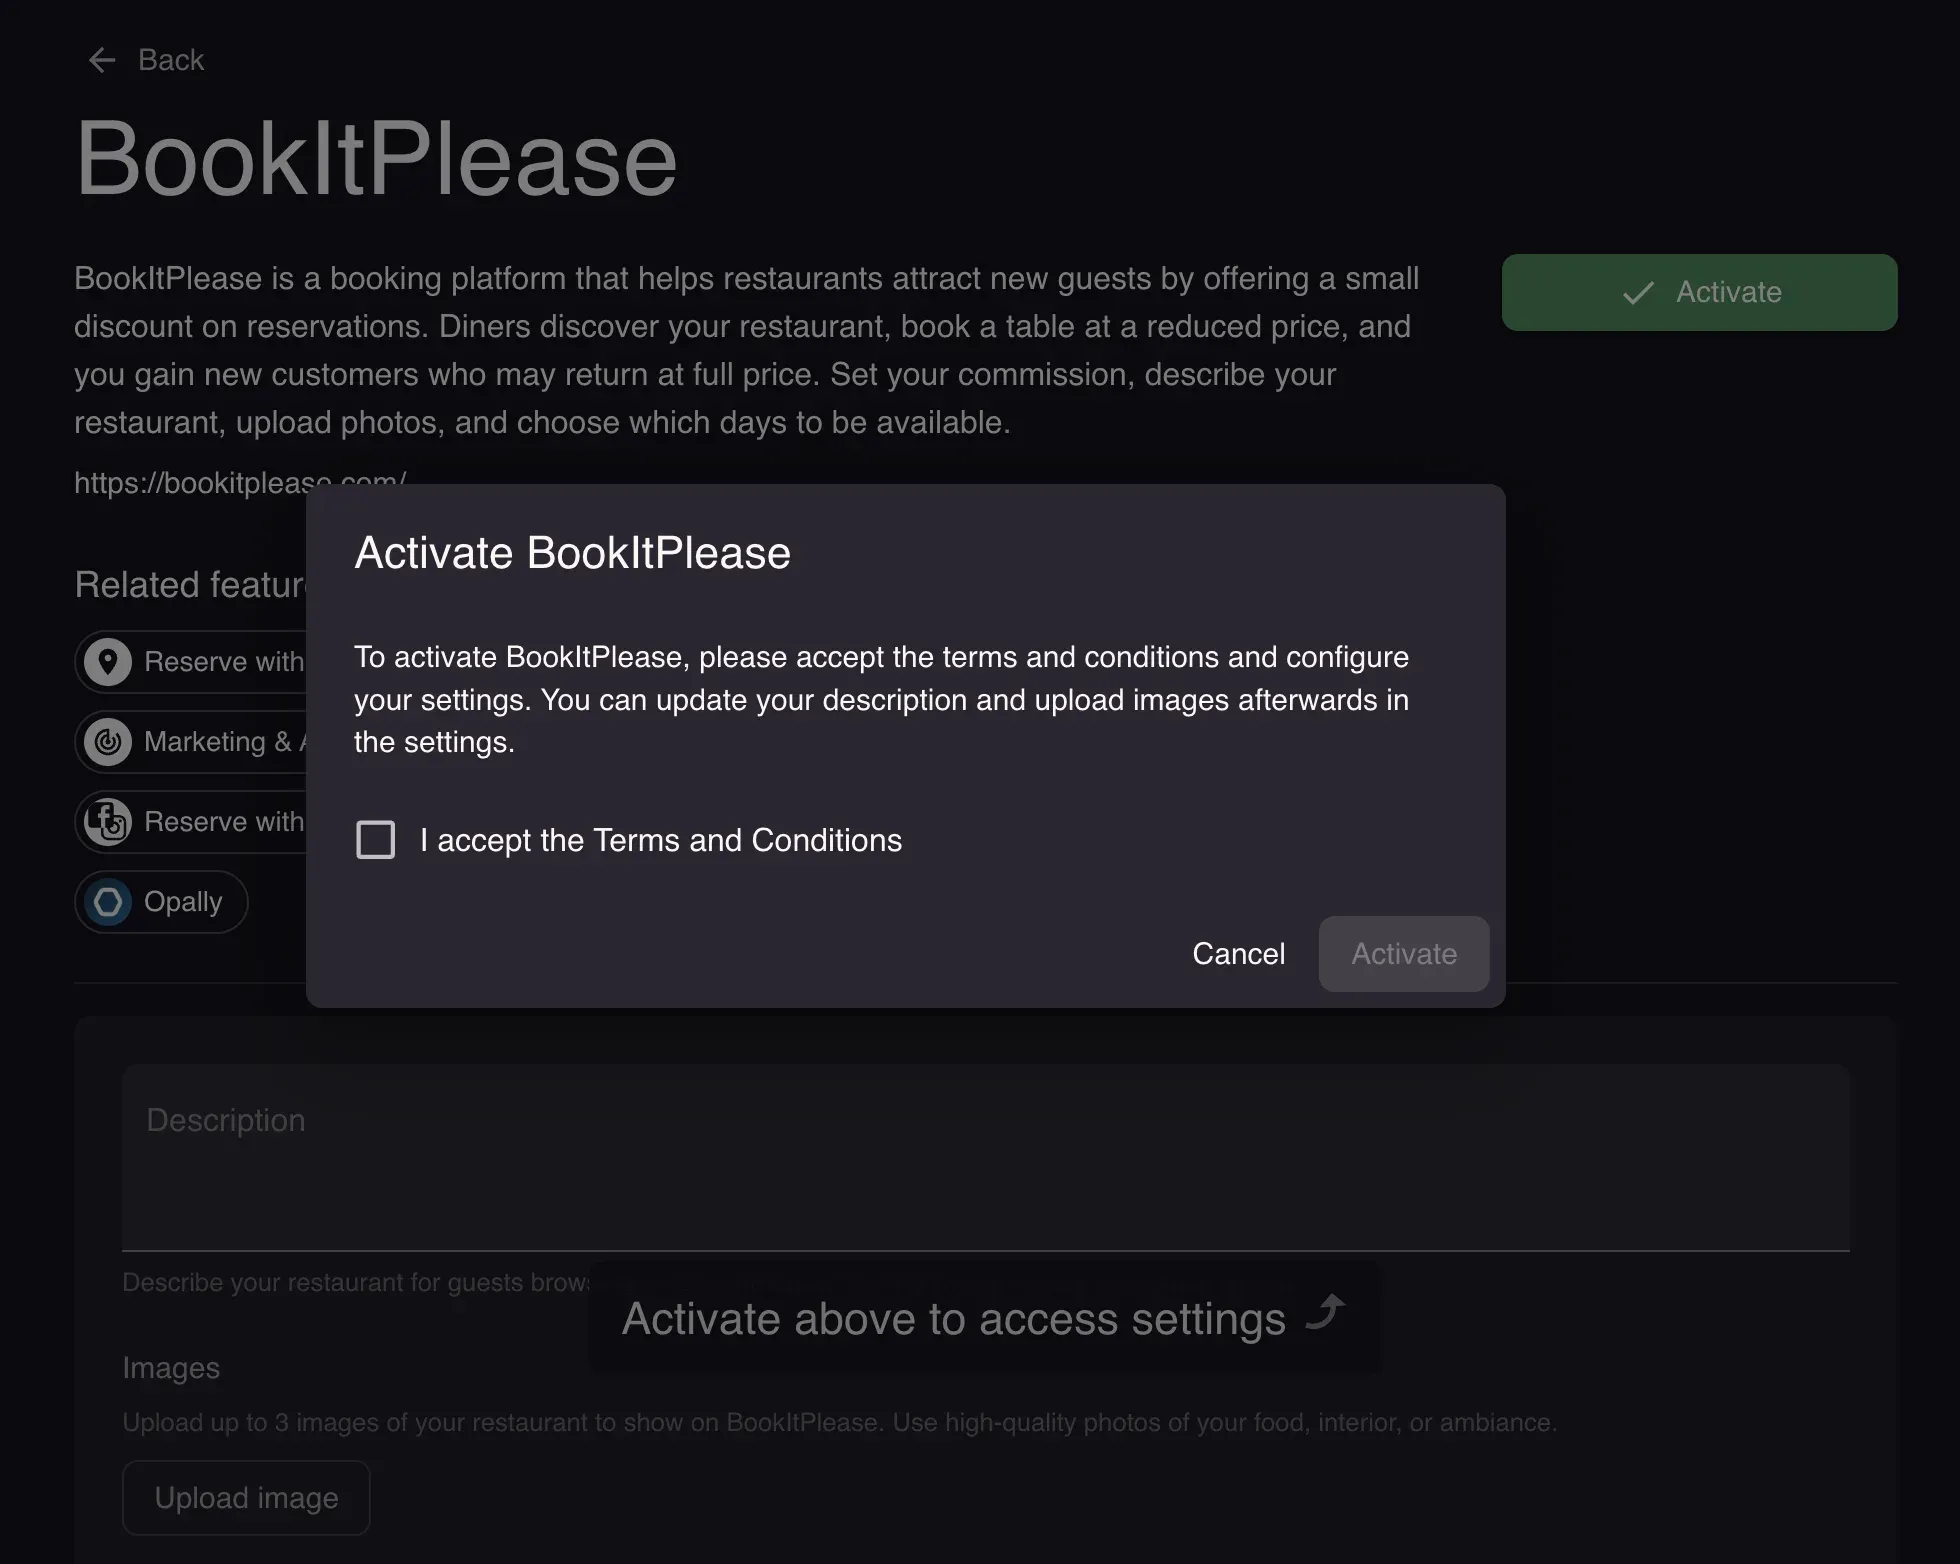
- In Resos, go to Settings & add-ons → Integrations.
- Open BookItPlease and select Activate.
- Read and accept the BookItPlease terms and conditions.
- Add your restaurant description and up to three images.
- Choose the days you want to be listed and set your commission percentage.
- Save your settings.
The partner connection is managed by Resos, so you do not need to create or copy an API key during setup.
Common questions
Where will BookItPlease reservations appear?
Bookings created through BookItPlease appear in your Resos booking calendar alongside your other reservations. Their booking source identifies them as BookItPlease bookings.

Can I control when my restaurant is available?
Yes. Choose the individual weekdays when you want your restaurant to be available on BookItPlease. You can update the selection in the integration settings.
What does the BookItPlease integration cost?
Resos does not charge an additional subscription fee for this integration. Your restaurant sets a commission percentage for bookings made through BookItPlease. The partner’s current terms apply to the marketplace service.
Do I need a Resos API subscription?
No. BookItPlease uses a partner connection managed by Resos. The Restaurant Booking product must be active, but the separate API add-on is not required.
Who should I contact for help?
Contact Resos support if you need help activating the integration or changing its settings in Resos. For questions about BookItPlease’s marketplace, guest experience, or terms, contact BookItPlease through its website.
You can also compare other ways to bring marketplace bookings into Resos, including First Table and Reserve with Google, or browse all Resos integrations.